December Favorites and Last Post of 2011

Hello Everyone

I do hope you have been enjoying your holiday as much as I have. I love having the time to read books, visit with friends and family long unseen, and to simply forget about nagging errands and to-do lists; to enjoy good food and company. It has been a pretty good December. School finished well, setting me up nicely for my final college semester. There’s been lots of good cooking going on and I’ve also spent the last week or so constantly glued to my new iphone. I never thought the day world come where I would admit reliance on a piece of technology but boy, my phone sure is a fun toy.

I spent Christmas at my grandparent’s house this year, as I have done for the past few years.  I actually quite like it. I used to think there was nothing like waking up Christmas morning in my own bed but have now come to realize that nothing beats spending the morning with as much family as possible: my aunts and uncles, cousins, grandparents, and my parents and sister. Christmas Eve was filled with so much laughter and joy. We sat around the table, in a constant state of chatting and snacking, the sounds of football games and “It’s a Wonderful Life” in the background. We moved straight from lunch to a snack of spinach artichoke dip with pita chips, to chicken stew and my homemade ciabatta for dinner, and then a literal tableful of desserts. My salted caramel ice cream and my aunt’s chocolate and almond cake made a winning pair.

The night ended with the traditional Christmas Eve game of Pictionary, a long-standing tradition since I was about eight-years-old. The game is old-school Pictionary, created in 1989, and the box is complete with a picture of happy game-players, men with handlebar moustaches and oversized teal sweaters and women in tapered light-washed jeans and side ponytails. It’s is essentially two whiteboards hinged together and a stack of cards listing items to draw, but regardless the game somehow always makes for extraordinary entertainment, so much so that we end the competitive Pictionary battle with stomachs aching and eyes streaming from laughing so hard.

So, Christmas is over, New Years’ is approaching, and soon enough, back to real life. But for now I will enjoy this last week of laziness, guiltless gorging, and finishing off my store of chocolate before those resolutions take effect. More than anything, I just hope for a good year. My resolution is to simply come to resolutions. This coming year will be my ultimate time for ending and hopeful beginnings so I want to end college well, to decide what I want in my life, to find a job, to check off the remaining things of my college bucket list, and to avoid feeling lost and confused as much as possible.

To finish of my last post of 2011, I want to give you my list of December favorites as well as a super easy recipe for some chocolate bark I made to share during the holiday. A great gift and the perfect way to turn ordinary chocolate into a sweet and satly treat.

Happy New Year everyone!

December Favorites

This great list of homemade gifts

I suppose I should start making something like this for myself

If only I was in London I could have tried the chocolate magic wands

Animal food art

Can't wait to start reading this and this

Food trends of 2012

Want to order a jar of this

I could NOT stop laughing at this

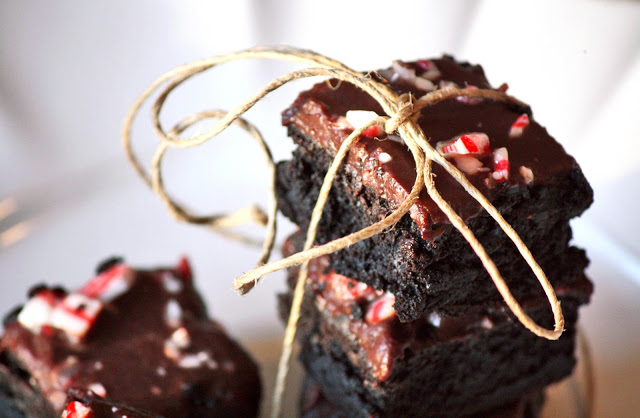
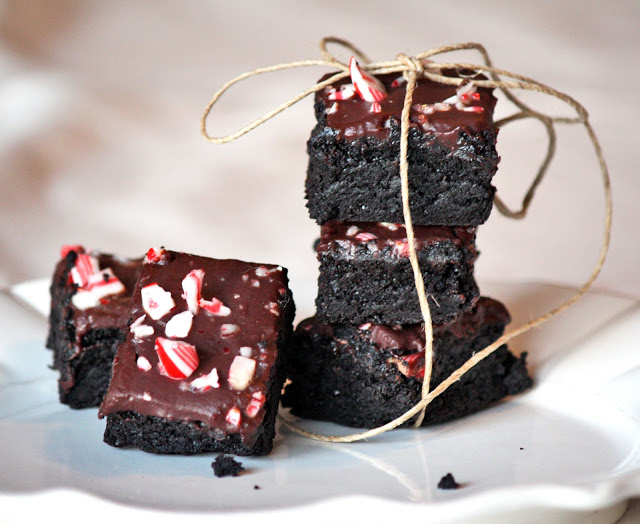
Made these cookies for my friends and we devoured them all!

Salty, Sweet, and Crunchy Chocolate Bark

Ingredients
8 oz. good quality dark chocolate (I used Callebaut)
a handful of toasted pecans
a handful of toasted, unsweetened coconut
a handful of soy nuts
a handful of chopped, dried cherries

Line a bread loaf pan with parchment paper on both sides. Prepare a double boiler on the stove with a metal or glass bowl sitting on a pan of simmering water. Chop the chocolate into small chunks and place it in the bowl of the double boiler. Stir with a heatproof spatula until fully melted and glossy. Once melted, remove the bowl from the heat and pour in the mix-ins. Stir to coat with the chocolate. Pour everything into the prepared bread tin and use the spatula to even out the chocolate, spreading it to all edges and pressing the top flat and even. Sprinkle the top with a little more pecans, coconut, soy nuts, and cherries so that people will know what is inside. Place in the refrigerator for about an hour until totally firm. Once set, remove from the tin, peel off the parchment, and cut the chocolate into blocks (whatever size you like) with a sharp knife. Store in an airtight container at room temperature.

Because Everyone Else Has...

I will too.

I’ve been on a search for a really long time. That search for the absolute ultimate brownie. For the one that transcends and stands apart from all other baked goods. It was a laborious search before I settled on one to make. I didn’t just want to pick any ‘ole brownie recipe of the existing millions at random. I knew what I was looking for but was scared of choosing the wrong option and ending up with an entire tray that did not meet my vision. Now granted, a brownie is a brownie no matter how you cut it (chocolate, butter, sugar…all good) yet it is amazing how many varieties do exist. And I had a mission in mind and nothing but one result was going to satisfy me.

I am a very anti-box mix sort of person. I don’t care if its the most expensive one on the shelf but box mix brownies are nothing more to me than a lackluster and poor excuse for dense chocolate cake. They are so deficient of chocolate flavor that the main taste component more so resembles the cardboard box it was packed in. A brownie should not a have a flaky and fluffy crumb to it. That’s what cake is for people. With brownies, I want something creamy, melting, and rich with just the right amount of leaven to make something with a little more springiness and tenderness than fudge. That happy medium between cake, cookies, and candy that stands all on its own.

I finally decided that I found a winner after seeing the recipe for Alice Medrich’s Cocoa Brownies on Smitten Kitchen’s blog. Just by the picture I know it was what I was looking for. They looked dense, rich, and intense, yet still carried a delicacy and lightness. I bookmarked this and later, after just a little more brownie recipe research, realized that everyone and their mother has made this recipe with the same results: they are the best brownies to ever exist. If I could take them and give them a name of my own it would without a doubt be something along the lines of black velvet. Smooth, but with a dark side. Creamy, but daringly bold. They are what I’ve been looking for such a long time.

And let me just say that they are easy easy easy. People go for box mixes to avoid struggle but I swear this is easier. It requires nothing more than a double boiler. Now, don’t let the fancy terminology scare you off; this is just a metal bowl sitting over simmering water. There is no need for a mixer, its only 6 ingredients (seven if you count the pinch of salt), and it dirties nothing more than a bowl and a wooden spoon that you get to lick clean anyway. Do I have your attention now? They get the deepest, most intense flavor from nothing but straight up Dutch-processed cocoa melted into a grainy tar-like paste with butter and sugar. It’s gets mixed with a few eggs, vanilla, and the tiniest smidge of flour and it magically transforms into literal liquid velvet. It bakes off, rising slightly with the subtle gluten network giving it some bounce but for the most part it stays compact, sealing the fudgy richness inside. And when you cut in, the deep black interior is revealed, dark with the secrets of its mind-blowing powers hidden within. You will blow people away with these. They will literally think you are a culinary genius and to be honest, this simple recipe makes for brownies that are far superior to anything I’ve EVER had in a restaurant. Just wait for it, that pinnacle moment when all of your guest reach in for these and before you know it, a crowd of people, lost in chocolate induced coma, are standing around your kitchen, a smile playing on their mouth and teeth as black as the night. It’s a sight to see.

Cocoa Brownies
Recipe originally from Alice Medrich
makes 16 or 25 brownies

These are great on their own but I always have a tendency to want to jazz thing up a little. The first time I made these I topped them with a simple ganache and candy cane pieces. That’s what is pictured above. I did overcook the first round a little because my oven at school is abnormally hot, but I made them a second time yesterday and cooked them to exactly they way they are supposed to be. This time I gave them a coating of soft amaretto ganache and a dusting of cocoa power. And since they were still a little gooey and soft, I kept them in the freezer for about an hour to firm them up, which made for really clean, perfectly squared slices.

Ingredients
10 Tbs. butter
1¼ cup granulated sugar
¾ cup plus 2 Tbs. Dutch-processed cocoa powder
¼ tsp. salt
2 eggs
½ tsp. vanilla
½ cup all-purpose flour

For the ganache
3 oz. dark chocolate
3 oz heavy cream
possible mix-ins (1 Tbs. amaretto or other liqueur of choice or 3 chopped candy canes or anything else that suits your fancy)

Preheat the oven to 325 degrees. Line a 8X8 inch brownie pan with parchment paper so that it hangs over the edge and lightly coat it with oil. Set aside. Combine the butter, sugar, cocoa, and salt in a metal or glass bowl. Place the over a saucepan filled with about one inch of water (the bowl should not touch the water) set over medium heat so that it is simmering. Stir the mixture occasionally with a rubber spatula until it starts to melt and then stir constantly until all of the butter is melted and the mixture is just warm to touch. Remove from the double boiler and set the bowl aside to cool for a minute.

Add the eggs one at a time and beat each one into the mixture with a wooden spoon. Once fully incorporated, the mixture should go from a grainy paste into a very smooth batter. Mix in the vanilla and then add the flour and fold in until just incorporated. Finally, using the wooden spoon, give the mixture 40 vigorous stirs. Pour into the prepared pan and cook for about 25 minutes until the top is set and springy. A toothpick will not come out clean but don’t worry, they are done. Pop into the freezer for about 30 minutes to an hour to firm up.

Once the brownies have been in the freezer for the hour you can eat them as they are or top them with the ganache. To make the ganache, finely chop the chocolate and place it in a metal of glass bowl. Heat the cream in the microwave until just boiling. Pour it over the chocolate and let it sit for 30 seconds. Then stir it until it is smooth and glossy. You and incorporate any mix-ins or flavorings at this point. Pour it over the brownies and place back into the freezer for about 30 minutes to set. Once the ganache is firm, remove the brownies from the pan by pulling up on the parchment. Cut with a sharp knife into however many pieces you desire and dust with cocoa powder.

Salty Vanilla and Cardamom Caramels

I’ve been having a really intense crafting itch lately. I don’t know if it came from the upsurge of holiday spirit and the homemade gift guides I’ve been poring over. Or it could be a way to procrastinate from studying for my finals. But maybe it’s my outlet for the angst and worry I have over the fact that in only one week, I’ll have one semester of college left before the real world hits. “Oh, to only be able to make pretty little crafts for a living and get rich by writing a book on it,” is what the dream world in my mind might be telling me. Sounds a whole lot nicer than what reality is telling me…“you’ll never find a job with a career in media studies.”

I’ve been searching for an excuse to create prettily wrapped edible gifts for a while. I’ve had a Michael’s supplies lists and a hoard of recipes ready to roll and this past weekend the opportunity came about to make use of some of that. I finished my internship this week and of course I needed a parting gift, right? Move over CSS Web Styling Guide and hello candy thermometer. But what to make? Then I remembered that last Christmas, in London, I would go to the Melt counter at Selfridges and buy one of their salted vanilla caramels for a mere pound and would sneak little sweet bites throughout the day. They were wrapped up in a square of parchment, the ends twisted up tight so that the caramel squeezed against the paper hinting at the greasy yet beautiful butteriness within. Thinking of those, I had to make them.

I used this Ina Garten recipe because it had the best reviews but with some slight changes. The major change is that I didn’t use fleur de sel. Don’t get me wrong; I was more than ready to pay the hefty price for the lovely delicate salt, but in this small town, it was nowhere to be found. I used pink Himalayan sea salt instead, which was actually still nice. I also infused them with some cardamom too to give a richer, smoky flavor and dipped them halfway in some nice dark chocolate just for the sake of it.

They turned out wonderfully, cooked to the firm ball stage so that they are sturdy but still turn into a puddle the second they touch my tongue. They firm up quite a bit in the fridge (which really worried me at first because I thought I overcooked it and made brittle) but just a few minutes at room temperature softened them up to optimal chewiness. These are not those caramels that most liken to instant cavities. These don’t have the time to stick to the teeth before they melt into creamy sweetness. The salt makes the slightly burnt sugar taste stand out even more and the spices add depth without overwhelming the caramel. Finally, the chocolate...well, enough said. I wrapped these too with parchment, popped them in a craft paper box with some burgundy raffia, whipped up a little label and tied it all together with some twine. 

I will probably have to take a little break from the baking next week (that’s what I say now) but once the tests are finished and I’m back home with nothing but time and Christmas cheer, the candies, cookies, and crackers and fun packages are going to make a massive appearance. My friends and I took an oath of no gift exchanges this year but surely they’ll forgive me for succumbing to my need to bake and craft. In the mean time, however I’ll make do with this fabulous creation: rum balls, malt balls, ice cream…sound like a finals week savior!

Salted Caramels
adapted form Ina Garten
makes 32 caramels

Ingredients
1½ cups sugar
¼ cup light corn syrup
¼ cup water
1 cup heavy cream
5 Tbs. unsalted butter
½ vanilla bean, split and seeds scraped out
1 tsp. cardamom
1 tsp. fine sea salt or fleur de sel plus more for sprinkling
4 oz. good dark chocolate

Line an 8 inch square baking dish or pyrex dish with parchment paper, letting it hang over two sides (this will make it so you can lift the caramels out). Lightly oil the paper with vegetable oil. In a deep saucepan, combine the water, sugar, and corn syrup and bring it to a boil on medium-high heat until it is golden brown in color. Do not stir but occasionally swirl the pan. Meanwhile, in another saucepan, bring the cream, butter, vanilla seeds and pod pieces, cardamom, and salt to a simmer. Once simmering, remove from heat, remove the vanilla pods, and set aside.

Once the sugar is done boiling, remove from the heat and VERY CAREFULLY, pour in the cream mixture while stirring with a wooden spoon. Once all combined, return to a medium-low heat and let cook, without stirring until it reaches 248 degrees on a candy thermometer or firm ball stage. Once it reaches temperature, pour into the prepared pan and smooth out the top with the wooden spoon to pop any bubbles. Place in the refrigerator for a few hours to set. Once set, take out of the refrigerator and remove from the pan by pulling up on the parchment. It you have trouble taking it out, dip the bottom of the pan in a bowl of hot water until it comes loose. Cut the caramels into 32 pieces and store in the refrigerator until you are ready to dip them in the chocolate.

When ready to dip them, place a metal bowl over a pan of shallow simmering water to make a double boiler. Place the chocolate in the bowl and stir until melted. Dip the caramels halfway in the chocolate and place them on a parchment-lined sheet to harden. Sprinkle each with a little bit of the salt. Once the chocolate has completely hardened, wrap them in parchment squares and store either in the refrigerator or at room temperature.

Holiday Snack (CRACK)ers

Do you know what these little morsels are? These are possibly some of the most uniquely flavored, amazingly textured, little biscuits I’ve had…ever. That’s why the are (crack)ers. They’re drugs in snack form. They’re addicting to the point where you can’t ever seem to stop yourself from going for another sweet and savory crunchy bite. Yet, believe it or not, this is one addiction that you won’t regret making.  Because, despite the rich butteriness and the sweet, caramelized crispness of these crackers, they are VERY healthy. No fats and oils here. Just sweet dried figs, tons of nuts and seeds, woodsy rosemary, a dash of whole wheat, natural honey, and a lot of creamy, yet low-fat, buttermilk.

These crackers could possibly be a little bit of a lifesaver this Christmas season. Flavor-wise they are just as satisfying as the masses of cookies, sweets, and other naughty things you’ll be tempted with. Yet you will know that they are actually on the nice list. And with such a great crunch, they’ll be a real stress-reliever when the craziness of the holidays makes you feel like you could just…crack.

They are the easiest things to put together and the batter is pretty much assembled in one bowl. The whole process is a lot like making biscotti yet so much simpler and cleaner. The batter is split between two loaf pans and let to cook until golden and spongy. They cool completely, spend some time in the freezer to firm up and are then sliced into paper thin pieces before being toasted to nutty crispness in the oven.

The flavor is a little hard to describe. They definitely have sweetness from the honey that becomes almost molasses-like is it caramelized with the toasting. They also have they unusual tanginess from all of the buttermilk. A rich buttery smell permeates the whole house as it cooks, which strangely actually comes from the rosemary. Though herby there is a caramel-like undertone. It’s a smell that is reminiscent of fireplaces, cool, snow-dusted forests, and sweet toffees. And finally, the extraordinary number of figs and nuts adds lots of texture layers and rich toasty flavors.

There is a lot of potential for ways to top these crackers. We enjoyed them with chesees of all sorts; sharp, aged cheddar cheese, brie, smoked gouda, or a simple smear of mascarpone. Though I’m sure there are so many other uses for these. In fact, I almost liked them best plain. I am also really interested in swapping out some other ingredients for other to make an apricot, pistachio, cardamom crackers or dried cherry, pecan, and thyme, maybe even candied orange, almond, and tarragon. The possibilities seem endless. I hope you try these out in your own home and even consider them as a nice gift along with some cheese and snack bowls.

Holiday Snack (CRACK)ers
Makes about 70 crackers
adapted very slightly from Seven Spoons

Note: It can be a little hard to tell when these are done toasting because they stay soft while in the oven and don’t crisp up completely until after cooling. So, I would start at 15 minutes per side and if they still seem a little softer after cooling, pop them back in the oven for five minutes at a time until they reach good crispiness. But be careful not to burn them! Also, if they start to get soft after a few days form air moisture (if they last that long) you can again place them back in a 250 degree oven for 5-7 minutes, let them cool, and they will be perfect again.

Ingredients
½ cup chopped walnuts
¼ cup pepitas (pumpkin seeds)
1½ cups all-purpose flour
½ cup whole-wheat flour
2 tsp. baking soda
1½ tsp salt
2 cups buttermilk
¼ cup brown sugar
¼ cup light honey
1 cup chopped dried figs
¼ cup shelled sunflower seeds
¼ sesame seeds
1½ tsp finely chopped rosemary

Preheat the oven for 350 degrees and grease two 9 by 5 inch loaf pans with butter or cooking spray.

Place the walnut pieces and the pepitas on a baking sheet and toast in the oven for 10 minutes. Set aside to cool.

In a large mixing bowl, combine the flours, baking soda and salt. Add in the brown sugar, honey, and buttermilk and stir with a wooden spoon until just combined. Add the toasted nuts and the rest of the ingredients and stir to mix them in.

Divide between the two pans and bake about 35-40 minutes until golden and the top springs right back when you lightly poke it. Remove from the pans and leave to cool. Once fully cooled, wrap them up well and place them in the freezer until firm. This makes it much easier to slice and actually, it lets you slice up however many crackers you want to make at a time and leave the rest of the loaf in the freezer for later.

For the toasting, heat the oven to 300 degrees. Slice the frozen loaves into ¼ inch (or even a little less if you can) pieces and place them in one layer on a cookie sheet. Bake them for 15 minutes on one side, flip the crackers over, and then 15 minutes on the other side. Cook on a wire rack. Again, if they are too soft, continue to toast at 5-minute intervals until very crunchy.

Pumpkin Brioche

Well technically I should call this Heirloom Blue Hubbard Squash Brioche but that just sounds a little unappealing now doesn’t it. So let’s just keep things easy and stick with pumpkin. Now, I know that my posts from the last few months have been a little pumpkin overkill but can you blame me for taking advantage of the plethora of winter squashes available? And it was just Thanksgiving so I would dare to say that NOT having a holiday pumpkin post would be plain wrong.

So anyway, I was heading home for break with an interesting vegetable in tow, a blue hubbard squash I picked up as the farmers market for a dollar. I had zero plans for it and it had been sitting in my pantry for two weeks.  I can only imagine what my roommate thought of me every time she saw the bulbous object, grey, rough, and elephantine, propped alongside my pretzels and pasta like some sort of Jurassic fossil. But the kind man who sold it to me swore it was sweeter and smoother than a pumpkin, so I was sold…but what to do with it.

I looked to the farmers market for yet another idea. A week earlier I bought a delicious loaf of pumpkin brioche, but for $5 per mini-loaf I was determined to make it for my own. So I eventually I found this recipe and tried it out with my curious little squash. And oh was it delicious. Not only does it make three medium-large loaves, but somehow my own bread was such lighter, more tender, and of course was quite the bargain comparably.

I started by roasting my squash, letting it caramelize a bit before pureeing the flesh. The grayish blue skin actually imparted this slight green hue to the yellow flesh giving the squash puree an odd neon color yet, despite the funny look, it tasted purely like pumpkin and was unbelievably smooth. In my mixer I combined the squash with flour, yeast, and a load of eggs before finally slowly mixing in two whole sticks of butter, letting the fat coat each and every gluten strand for maximum tenderness. I impatiently waited as it rose slowly in the fridge overnight but the dough the next day was soft and supple and easily formed into tight, spongy loaves. They came out of the oven looking picture perfect; marbled, deep-brown and flaky crusts encased the hidden, yet soon-to-be-discovered, orange and squishy crumb.

As if I have not expressed this enough, this bread is so soft. I’m sure that the cup of butter is the culprit but think that the addition of the velvety squash made it even more supple than just regular brioche. And we took advantage of this bread’s culinary uses in any way we could. The next day my mom and I soaked thick pieces in milk, eggs, and vanilla and cooked it on a griddle for custardy and sinful French toast. We ate it for breakfast, both toasted and not, smeared with mascarpone cheese, walnuts, and a drizzle of honey. We had it as a side to our Thanksgiving dinner, lightly coated with butter. And today, I even put leftover turkey, gravy, cranberry sauce, and spinach between two slices of the bread for the ultimate Thanksgiving leftover sandwich. It is perfection.

Pumpkin (or squash) Brioche
adapted from Hungry Oyster
makes 3 loaves

Don’t be afraid by how long the bread takes. The actual labor involved with making the bread is really simple and the dough it quite easy to work with. Also, don’t be tempted to add too much extra flour. The dough will be sticky at first but the gluten will really toughen and relax as it sits overnight and it becomes much easier to work with.

Ingredients
For the sponge:
¼ cup milk, at room temperature
2½ tsp. instant yeast
1 cup pumpkin or squash puree, canned is fine but fresh is suggested
1/3 cup sugar
1 cup bread flour (I used King Arthur organic)

 For the dough:
5 cups bread flour
2 tsp. salt
1 tsp. cinnamon
6 large eggs, room temperature and lightly beaten
2 sticks softened unsalted butter

For the egg wash:
1 egg, lightly beaten with 1 tsp. water

First make the sponge. In the bowl of a standing mixer, whisk together the milk and yeast and let sit for 5 minutes. Add the pumpkin or squash puree, sugar, and 1 cup of flour to the milk and yeast. Stir to form a paste, cover with plastic wrap, and let rise in a warm place for 30-40 minutes.

After rising, place the bowl in the standing mixer fitted with the paddle attachment. Add the 5 cups of flour, salt, cinnamon, and eggs and mix on low for 2 minutes. Increase the speed to medium and let the mixer knead the dough for about 5 minutes while occasionally scraping the dough off the paddle. Then, on a medium low speed, add the butter, 2 Tbs. at a time. Let the dough incorporate the butter and then continue mixing for about 5 minutes or until everything is combined and the dough is shiny and smooth.

Scrape the dough from the bowl and form into a ball, adding any extra flour as needed, but again be careful to not add too much. Transfer to a lightly oiled bowl and roll around to coat the surface of all the dough with the oil. Cover the bowl and let rise at room temperature for 2 hours. After this time, punch down the dough, reform it into a ball, and cover again with plastic wrap. Let rise in the refrigerator overnight.

The next day, remove the dough from the fridge and transfer to a lightly floured surface.  Lightly oil three 9 X 5 X 3 inch loaf pans. Cut the dough into thirds and use a floured rolling pin to roll to roll each piece onto a rectangle that is 1½ times as long as the loaf pan and twice as wide. Starting from the short side, roll up the dough like a jellyroll sealing the loose edges and ends when you reach the end. Place the dough into the pan, seam side down and gently press down on the dough to spread it out across the bottom of the pan as much as possible. Cover the three loaves with a towel and let rise for 2 hours.

10 minutes before the dough is done rising, preheat the oven to 400 degrees. Once the oven is heated, prepare the egg wash and brush over the tops of all three loaves. Place the tins in the center of the oven and cook for 10 minutes. Then lower the temperature to 350 and then continue to cook for 30 minutes, rotating the tins halfway through, until the crust is deeply golden and glossy. Remove from the oven and let cool for 10 minutes. Remove the bread from the tins and continue to cool on a rack until room temperature. Best if eaten within 3 days.