Food Day 2011

Hello All,

I just wanted to say that I hope you had a wonderful and delicious 1st annual National Food Day. I love the idea that this could be the start of a powerful and life changing American tradition and that hopefully, in the future, it won’t take a designated day to make us eat healthy, eat locally, and enjoy meals with friends. These are the pleasures we should take part in at all times.

My community got really into this movement, extending the “Food Day” into a “Food Week”. My college is hosting food documentaries throughout the week, the town’s Co-op grocery store is having a kids food and craft session as well as a canning workshop. But most exciting was the big community breakfast we had this morning. All foodies of the community as well as our local farmers came out to gather and enjoy a simple yet healthy and entirely locally sourced breakfast. All benefits went to the food bank too.

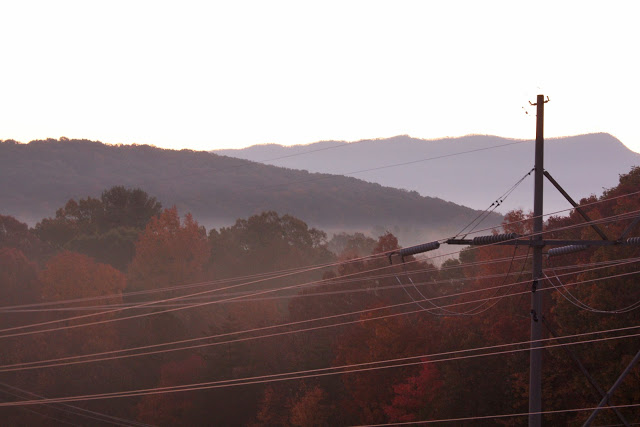
We were treated to sweet potato pancakes with honey butter and real maple syrup, free-range scrambled eggs, pasture-raised and local bacon and sausage, baked local apples, apple cider, and fair-trade coffee. Needless to say, it was delicious. But the real importance of the event wasn’t the food but the building of community spirit. I hardly knew anyone there yet I still went and was gathered graciously into the community’s arms. I sat at a table with strangers, discussing food, our passions, and just our lives. Two talented ladies performed bluegrass music, filling the air with a liveliness that contrasted so nicely with the frosty cold air. Bundled up and bleary eyed as I was, I still felt a warmth in my heart and as strong sense of intense awakening as I realized just how much I admire this community I am living in.

A morning spent with good food and friendly, passionate people. I can’t think of a better way to start the day.

October Favorites

This was the view from my window this morning. Though the power lines are a little bit of an eyesore, it was easy to overlook them when just beyond was a sea of mist and neon orange flecked with patches or periwinkle. I'm lucky to wake up to this every day especially now that October has presented us with gorgeous mountain scenery in every jewel tone imaginable. An hour later, the sun came up and I sat outside watching my breath turn to mist and letting the rays envelop my entire being.

Sadly, October comes with some elements that add a bit of bitter to the sweet. First, October means its midterms so this weekend, instead of enjoying long and carefree drives through the mountains, I am studying. And then, since everyone is together, studying in close quarters, we all get sick.

So I woke up this morning, sick and agonizing over my overflowing schedule but I looked out the window, and all of that crappy stuff didn't matter anymore for a few brief moments. I'm glad there are so many things in life that override the bad and make up feel happy. So now, as I sit blowing my nose and blogging in procrastination, I give you the list of things that have made me happy this October.

This shop just opened in our town a few months ago. They have the best decoration things.

Though I had some rough experiences in Paris, this beautiful video made me remember the good parts.

Molly Wizenberg was just in London. Her pictures of St John brought back the best memories.

Wouldn't it be great to have these scattered about your room.

Hey, this could be a job for me.

Can't wait for food week this week!

This look like a nice comforting breakfast. Now I just need to get those little molds.

Pumpkin condiments? Yes please!

I can't get over the never-ending innovation. Must try the smoke and stout bar.

So beautiful!

Recipes to come soon. Happy Food Day tomorrow!

Roasted Pumpkin and Gingersnap Ice Cream

Do you remember the pumpkin patch?

I remember walking into that carnival-esque wonderland each fall. I remember everything having this sort of shimmering golden glow to it. I don’t know if the experience was simply altered and intensified as it filtered through my child’s eyes but the pumpkin patch was certainly magical.

Where else could I romp around on teetering piles of hay bales? I’d emerge dizzy, a sloppy sort of grin on my face and stray pieces of hay sticking every which way from my hair like an unfortunate, neglected scarecrow. A sight to see I’m sure considering my parents dressed me in flannel shirts and stiff, straight legged jeans every day of my childhood.

There were petting zoos, big slides, and a country store where you could buy those sticks of colored flavored honey. I also recall having this strange irrational fear of the hay rides, refusing to step foot onto the wagon until assured that the ride would not present any scary, sudden changes in motion.

But mostly I remember picking out my pumpkin. Thanks to my dad’s neuroticism, a trait he passed onto me, the search for the perfect pumpkin was exhausting. It needed perfect roundness, symmetrical plumpness, a broad flat front for carving ease, and a good sturdy stem with a with a twisting curved handle. Back at home we’d make a day of mucking up the kitchen with strings of pumpkin goo and then giving funny faces to our new gourd friends. I always gave mine buck teeth. Always.

I went to the pumpkin patch this past weekend with some friends hoping for transportation into childhood. Instead we were asked to pay ten dollars to take a hayride to the patch, pick out the pumpkin, return, and then pay for the pumpkin. Oh, there was a four-foot high corn maze too. Disappointed, we turned around and went home deciding a pumpkin was not worth that price. Yet I worried, was my older age casting a gloomy cloud over the once-relished pumpkin patch? Had I lost all sense of my child-like imagination and exploration?

Had I turned into a dependent of modern-day entertainment no longer impressed by the simple pleasures of a pumpkin?

After long thought, I decided no.

Though that wonderful pumpkin patch no longer excited me in the ways it used to, it is now things like simply cooking that transforms me into that childlike being with heightened senses and emotions. It’s the thing that puts that golden glow to my world. That can make a pumpkin seem like the best thing in the world.

That answer came about as I remembered the quart of pumpkin ice cream I had sitting in my freezer. A creamy and intensely rich frozen treat I concocted from a baby pie pumpkin I meticulously selected from the farmers market, liberal amounts of pumpkin pie spices, brown sugar, and honey, and handfuls of crumbled gingersnap cookies. The pumpkin flavor was pumped up to extreme levels as it slow roasted in the oven for nearly an hour. I then pureed the caramelized flesh into such creaminess it flowed like orange ribbons from my spoon. I devoured the leftover puree by the spoonful, feeling ridiculously like I was eating baby food, delicious baby food at that. And finally, after the warming scents of spice were expelled into the air as the concoction churned, I took my first taste of the freshly frozen dessert and it was a shock to my entire system. The ice cream, in contrast to any other artificially pumpkin-flavored thing I’ve eaten, was so intensely fresh. So real. It was the entirety of fall spirit and the reminiscence of childhood glee all compacted into one spoon.

Pumpkin Ice Cream
makes about 1 Quart
adapted from Jeni Britton Bauer

This is a slight adaptation of Jeni Britton Bauer’s Jeni’s Splendid Ice Creams at Home so it uses her ingenious method of replacing eggs in the ice cream with cream cheese. This actually works really well for the pumpkin ice cream because the slight cream cheese flavor pairs like heaven with the pumpkin. And again, I cannot stress enough how important it is to use fresh roasted pumpkin. The canned stuff just won’t compare.

Ingredients:
I small pie pumpkin
2 cups whole milk
1 Tbs. plus 1 tsp. cornstarch
3 Tbs. cream cheese (full fat)
¼ tsp. salt
¼ cup honey
2/3 cup packed light brown sugar
2 Tbs. light corn syrup
2 tsp. pumpkin pie spice
¾ cup gingersnap cookie crumbles

Preheat the oven to 400 degrees. Cut the pumpkin in half and deseed the inside. Place it on a baking sheet cut side down and roast it in the oven for 30 to 40 minutes until soft. Remove the skin and place the flesh into a food processor. Puree until velvety smooth. Measure out ¾ cup of puree for the ice cream and save the rest in the refrigerator for another time.

Mix 2 Tbs. of the milk with the cornstarch until smooth. Set aside.

Whisk the cream cheese and the salt in a large bowl until it is smooth. Add in the honey and the pumpkin puree and stir until well combined.

Prepare a large ice bath.

In a 4-quart saucepan, combine the rest of the milk, cream, sugar, corn syrup, and pumpkin pie spice. Bring to a boil and continue boiling for 4 minutes. Remove from the heat and whisk in the cornstarch and milk mixture. Place back on the heat and boil for one minute until thickened somewhat.

Slowly whisk the hot milk mixture into the pumpkin and cream cheese mixture and stir until combined. Pour everything into a gallon zip-lock bag, seal, and place in the ice bath for at least 30 minutes or until well chilled.

Pour the mixture into the ice cream maker and freeze according to manufacturer’s instructions. When done churning. Pack the ice cream into freezer safe storage containers, layering with the gingersnap cookie as you go. You could also simply fold them all into the ice cream if you want. Freeze for four hours before eating.

The Art of Simplicity

I find that I like to make things complex with my cooking. Maybe it’s for the sake of a little challenge, making me feel like I’m furthering my knowledge or something. Sure, why not make the elaborate curry that requires me to spend ridiculous amounts of money on spices from a specialty food market? Sound like fun! Or, macaroons? Sure. Who doesn’t love tediously piping little circles of egg whites onto parchment? Even the other day my mom told me, “Oh Katie, you’re such a Martha.” I took it as a compliment.

But whatever the reason for this extravagance, I always tend to stray from the straight path, opting for rocky, muddy, and treacherous road instead. The flair, unfortunately, doesn’t always work in my best interest. Like the time I tried to make my family a vegetarian molé chili; “you’ll love it, the secret ingredient is chocolate!” And when we sat down to bowls of a substance totally indistinguishable from garbage sludge, I had to admit defeat. Or the time I attempted making treacle tart to bring to a British themed dinner, only to end up sealing the teeth together of all who ate the cement-like toffee. Their pained but polite words of approval settled uncomfortably in my stomach.

As much I do enjoy culinary adventuresome, I still can’t deny comfort in simplicity. The food that I post here are my weekend experiments. What I eat on a normal basis is more along the line of cheese and crackers or yogurt and granola or, my new strange but favorite fixation, egg salad sandwiches. To me, taking very few ingredients and combining them in ways that result in powerfully flavored dishes is almost as much of a challenge as making those extravagant meals. I like this challenge too and through trial and error, I’ve discovered that there are keys to great simplicity in food.

First, successful simplicity requires good ingredients. Simple food does not have extra fluff to mask anything under par. There are only few components and those need to be top notch to provide heightened and optimal flavor.

Also, there needs to be contrast. This is what turns ordinary and bland into something that gets people excited. Simple does not have to be boring at all. When two or three ingredients that are different yet complementary, not only in flavor but texture, come together, it causes all senses to stimulate at once making for a memorable eating experience. And finally, it needs to be cooked with love and care, the ingredient that makes a difference in all cooking.

So one rainy and cold evening a few weeks ago I made grilled cheese, the ultimate comfort food, but with a twist. I cut up thick slices of ricotta bread from the farmers market. I crammed the inside with slabs of creamy Fontina cheese, crispy organic bacon, and slices of just-underripe local pears. I gave the bread a lovely swipe of butter and let it spend some time getting hot and melty in the pan.

Though unconventional it worked. The sweet pears were a perfect match to the salty bacon and the Fontina, though mild, enveloped all in a buttery blanket of richness. It was the bread that really made this sandwich. It crisped up beautifully because of the high butterfat content and its milky and slightly tangy notes rounded out the whole package. I enjoyed it alone, a sublime retreat, that lasted mere minutes but felt like hours in food divinity. Each bite was like music as my teeth moved through layers of resounding crunch. In secluded gluttony, I licked my buttery fingers unashamedly for I had finally truly felt like I discovered the art of simplicity. Four ingredients (five if you count butter) and one amazing sandwich.

Fall Grilled Cheese
serves 1

All I can say about this is go all out. No skimping on this recipe please and savor it for every fatty and cheesy bite its worth. You can always work out later.

Ingredients
Ricotta bread (brioche, challah, or white country bread works too)
Fontina cheese, as much as you feel meets your standards of cheesiness
3 slices of bacon
1 slightly underripe pear
Butter

Heat a frying pan to medium and lay down the slices of bacon. Cook until crisp and drain on paper towels. Wipe out the pan and set aside for later.

As the bacon cooks, prepare the other ingredients. Slice two thick pieces of the bread and then slice as much cheese as you like. Slice the pear into quarters and then cut thin pieces from each of these. You will only need about half so you can eat the remaining slices as a snack.

To assemble lay about ¾ of the cheese on one piece of bread. Place the pears on top and them the bacon. Dot the remaining cheese on top of the bacon so it melts to the other piece of bread and holds the sandwich together. Lay the remaining piece of bread on top. Generously butter the outside of the sandwich.

Get a pan on medium heat and also turn the oven to about 400 degrees. Cook the sandwich in the pan for about 2 minutes a side, pressing down occasionally and constantly checking to make sure you don’t burn anything. Once both sides are golden brown and crispy, transfer the pan to the oven for about 2 minutes to let the cheese melt. Remove, cut any way you like, and enjoy.

Hummus, the Real Way

I had a slight epiphany the other day.

I was sitting at a table in the building where I have my major classes and was shoveling down my lunch before class when my teacher, who knows I like to cook and has read my blogs, walked by and commented, “Oh, so did you make that hummus?” I’m sure he wouldn’t have been surprised to hear a, “yes, just whipped it up last night,” and probably expected a detailed explanation of the recipe but instead I turned my head toward the tasteless and lumpy dip and replied with a resounding, “no.”

He left, probably thinking no more about the encounter but I felt embarrassed. I realized that I have been spending entirely too much money on tubs of hummus that I don’t even enjoy from the grocery store. I’m sure I’ve tried almost every brand out there and each one leaves me disappointed and struggling to finish it off. It’s always either too grainy or the flavor has the unpleasing bitterness of granulated garlic and onion. That, along with the list of stabilizers and preservatives among with the ingredients, just leaves me yearning for a better way to spend my precious dollars.

Solution: I’m making my own.

Why I never did this before is beyond my comprehension. I suppose it was the thought of having to wait overnight for chickpeas to soak and the hefty price tag on the jars of tahini. But when I did the math and discovered that a jar of tahini and a couple pounds of dried beans is enough for several month’s worth of hummus, I realized that the homemade way, though not exactly a time-saver, is a definite bargain for a product that I am waaaay happier with.

It’s difficult to explain homemade hummus to someone who has never tasted its wonders, to get the point across that a gloopy puree of beans can be so much more than just a way to make carrots taste more exciting. Homemade hummus is almost a dish in itself. It begs to be eaten plain with a spoon, though that’s not to say crudités and pita don’t benefit from its flavors. It showcases the earthy, sweet, and natural flavors of the chickpea itself without the cloyingness of excessive artificial garlic. And the chickpeas are brightened by a dash of lemon and cumin, intensified by the toasted nuttiness of the tahini, and transformed into pure velvety richness as they’re pureed with fruity olive oil and their natural cooking water. The texture really is astounding; it’s fluffy and creamy and when you drag a spoon through it makes a little crackling noise of millions of popping air bubbles.

So now I eat my lunches a little more proudly. Though everyone else may assume my hummus is another $4.00 waste from the grocery store, my taste buds know the truth. It’s the real deal.

Hummus and Pita
Adapted from The Healthy Foodie

Don’t be scared away by the prospects of using dried chickpeas. It just means a little planning ahead. But honestly, it makes a world of a difference since they are not impregnated with the salty brine that canned chickpeas reside with. Also, the trick of soaking and cooking the chickpeas with baking soda makes a huge difference. The soda really allows the beans to reach a point of maximum softness so they puree into such creaminess. If you really must use canned chickpeas, use two drained and rinsed cans as a replacement and just plain warm water. I like to eat my hummus with carrots, celery, snow peas, and of course pita bread. The pita in the pictures is a homemade, half whole-wheat variety and you can find the recipe here. The pita breads are best the first day they are made when still warm and soft but leftover pita can be made into chips, frozen for later use, or used as a great base for mini pizzas.

Ingredients
1 cup dried chickpeas
1 Tbs. plus ¼ tsp. baking soda
¼ cup tahini
juice of ½ lemon
1 garlic clove
½ tsp. salt
½ tsp. cumin
¼-½ cup chickpea cooking liquid
¼-½ cup olive oil

Place the chickpeas in a saucepan and cover with at least an inch of water. Add 1 Tbs. of the baking soda and stir until dissolved. Let sit overnight or throughout the day (at least 8 hours).  After soaking, drain the liquid and add more. Soak for an additional hour or two.

To cook the chickpeas, refresh the liquid again, this time adding enough to cover the chickpeas by at least two inches. Add the remaining ¼ tsp. of baking soda and stir to dissolve. Bring everything to a boil and cook on a medium high heat for 1 hour and 15 minutes, adding more liquid as it evaporates and skimming off any foam or skins.

When the chickpeas are finished cooking, reserve 1 cup of the liquid and drain them in a colander. If you wish, remove and discard the skins (this is not necessary). Place them in a food processor and blend until you have a thick paste. Add the tahini, lemon juice, garlic, salt, cumin, ¼ cup of the water and ¼ cup of the olive oil and puree until the hummus until it is creamy and smooth. Add more water and olive oil, as you need to, depending on the consistency you like. I like it smoother and runnier so I add more of the liquids. Adjust any other ingredients to taste as well. It tastes great freshly made and still warm but to store, transfer to an airtight container and keep in the refrigerator for up to two weeks.