Slow Food, Fast People

I’ve lived just outside the D.C. Metro area for my entire life but I can probably count on my two hands the number of times I’ve actually been to the city. Mostly they were for school field trips and a couple of concerts but the sad part is, I can’t even recall a time I visited for the mere sake of visiting. Yet, no matter how many times I intended to take a day trip to the big city during the past, oh… year, the thought of driving an hour (not including traffic) to get to a metro station, only to sit on the metro for another 30 minutes, is quite the deterrence. Yet, when temperatures spiked to 90 degrees and cherry blossoms were in full bloom almost two weeks ago, I could wait no longer.

I turned out to be a fulfilling and all-around fun day, a mini-field trip by myself. I got lunch at my beloved Pret (and refueled with yoga bunny detox after a 2-year lapse), visited my cousin at her work, sat in a park under a cherry tree, walked around like a dazed, camera-to-face tourist, and saw the American Food history exhibition/Julia Child’s kitchen at the American History Museum. Like I said, a pretty decent day. It did leave me exhausted though and I realized that D.C is a pretty exhausting place, much more so than other cities I’ve visited. People seemed to move about 10 times faster than normal and live their lives by means of a well-planned itinerary on their iPads and a cell phone that has taken up permanent residence at their ears. It was all a bit much. So naturally, in the spirit of a more relaxed, slow lifestyle, I bought a Dutch oven…naturally.

The renowned Le Creuset has been on my wishlist for quite some time but always frightened me away with a severe case of sticker shock. It suddenly hit me though that I should check them out at a factory outlet store and ended up walking away with a nearly half-price 5.5 quart with just a few paint imperfections. Fittingly, I broke it in with some classically slow sort of food. First I made a Dutch oven paella from Cook’s Illustrated, one of those stovetop, to oven, to table sort of dishes that Dutch ovens are perfect for. But, most importantly I made Jim Lahey’s no knead bread, the singular recipe that has been sitting in my queue, waiting for this one essential kitchen tool to come along. Kneadless to say (get it), it produced the most wonderful, rustic, and effortless loaf of bread to possibly exist.

I know that I am, per usual, the last to hop aboard fads, in this case the no-knead bread bandwagon. But I always say better late than never, eh? It’s simply amazing how you can mix together a few ingredients into the saddest, shaggiest mixture and 24 hours later it’s a bubbling brew of elastic, soft dough. Again, slow food for the win. Mostly I’m excited that I no longer have to solely rely on my standard bread baking method involving that dreaded moment of tossing the 5 lb loaf precisely onto the center of the preheated baking stone with a pizza peel. Now I just preheat the Dutch oven, plop the dough inside, put the lid on, put it back in the oven, and presto, out pops bread.

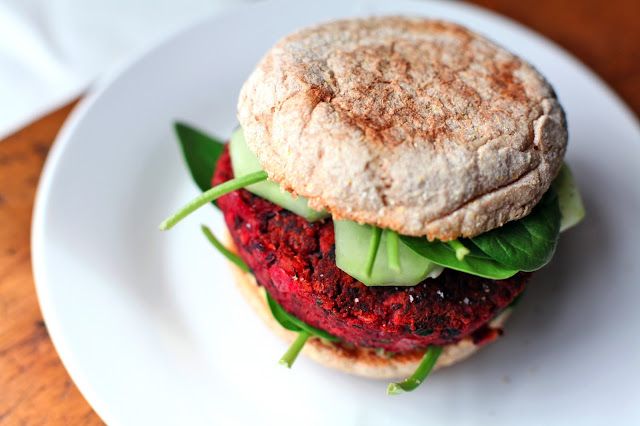
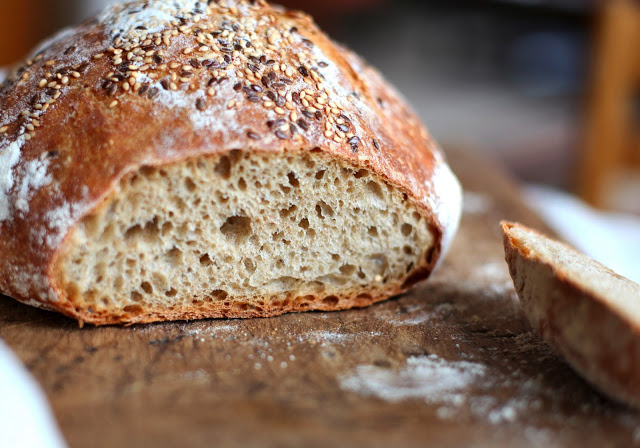
And not just any bread. Bread that sings a crackly little song when pull it out. Bread that stays so soft and tender on the inside but with a perfect toothsome crust that hurts your jaw a little but in a good way. Bread that makes breakfast such a dilemma because you cant decide weather to dress it up with peanut butter or jam or leave it in its full naked glory with just a hefty swipe of salty butter overtop. And maybe you should use it for the best darn turkey bacon and avocado sandwich for lunch too...just a thought. The only problem I seem to have with it is that it disappears maybe a little too fast. But no worries, just give me another day and there’ll be another ready, no rush.

No Knead (semi-whole wheat) Bread
Recipe by Jim Lahey

Ingredients
3¼ cups (300 grams) unbleached bread flour
¾ cup (100 grams) whole wheat flour
1¼ tsp (8 grams) salt
½ tsp (2 grams) instant yeast
1 1/3 cups (300 grams) room temperature water
additional flour or cornmeal, for dusting
flax and sesame seeds for the top, optional

Combine the flours, salt, and yeast in a bowl and stir until combined. Add the water and mix using your hands or a wooden spoon until everything comes together. You don’t need to knead it, just mix until there is no more loose flour and you have a shaggy, sticky mess. This is good. Cover the bowl and set aside for 18-24 hours.

After waiting, scrape the dough out onto a lightly floured surface and fold the dough under until you have a roundish shape. Take a clean cotton towel and place it inside a clean bowl. Dust the towel liberally with flour or cornmeal and shake and seeds you may want coating your bread into the towel. Place the bread seam side down in the bowl and cover with the loose ends of the towel. Let rise for 1-2 hours.

Meanwhile, when the dough has about 30 minutes to go, place your Dutch oven with the lid on in the lower-middle rack of the oven and preheat to 475 degrees. After 30 minutes, remove the Dutch oven and take off the lid. Lift up your towel with the dough inside, place your hand underneath, and quickly invert the dough into the center of the Dutch oven – it will now be seam side up. Cover the pot and place back in the oven for 30 minutes. Then remove the lid and bake for an additional 15 to 30 minutes until the bread is deep brown. Remove from the pot with the help of a wooden spoon. If the crust is crackling and the bottom sounds hollow when you thump it, it should be done. Place on a cooling rack and wait about 2 hours before cutting open…if you can.

Loony Burgers

I discovered veggie burgers in London, strangely enough. The residence manager of my flat (who also happened to be a mother-like figure to all 28 of us on the study abroad trip) was a pescetarian but also a big foodie and therefore a powerhouse of knowledge for anyone looking for vegetarian, vegan, and all-around good, organic cuisine. She helped me discover Planet Organic, Food For Thought, Hummus Brothers and, most notably, Mildred’s, a hole-in-the-wall, vegetarian café and restaurant that just so happened to have the best vegetarian burgers and sweet potato fries in the planet. These veggie burgers are by no means a comparison to the flimsy, rubbery things in the frozen food section (do people really eat those?). I would assimilate them to a sturdier version of falafel, a swelling patty of mashed beans and whatever fresh vegetables they had that day (a certain zucchini, sweet corn, olive, and herb version was my favorite). They were served on a seeded bun with arugula and alongside crispy yet tender sweet potato fries and a basil yogurt dipping sauce.

Now I was, and still am, a meat-eater but have made an earnest effort to go meatless a couple days a week in the past 3 years or so. So back in the U.S., I desperately searched for a comparable replacement of my meatless burger only to be met with unfortunate realization. Almost all vegetarian substitutes of commonly meat-containing foods have soy as a prominent ingredient. This is a problem and has been since the first time I ate tofu and ended up with fat swollen lips and an uncomfortably prickling and itching scalp and neck. Soy products and I do not get along (except soy sauce, which for some reason gives a much reduced allergic reaction) so I have since avoided the likes of all veggie burgers in the fear of the hidden evil ingredient.

That is, until I discovered Luna Burgers.

I saw them in the freezer section of a local food co-op, a neat little package of 2 patties in a rustic brown cardboard box. I was dubious when I went to look at the ingredients, expecting the worst. But wait! Was I reading correctly? No soy?! It was just a simple, no-fuss list of basic ingredients: beans, grains, vegetables, and herbs/seasoning. And to make a long story short, the Luna Burgers came home with me. I cooked them up in a frying pan and met the same flavorful, herbaceous, and creamy yet crispy, burger-sensation as I did at Mildred’s. I found myself in veggie burger heaven, so much so that I came up with the brilliant idea of making the exact same thing myself at home. Why does it always come to this – why can’t I just buy already made things like everyone else? But I must say, it was entirely worth it.

Loosely following the ingredients list on the back of the Luna Burger package and guestimating on ingredient amounts, things somehow turned out just right the first time, resulting in 4 patties just over a quarter-pound each. They even looked like beef, tinted red from grated beets. I put the patties in the freezer for future use but you could certainly cook them right away. Just heat a small splash of olive oil in a pan and cook both sides until browned and crisp. I like them on an English muffin with spinach, cucumbers, goat cheese, and sea salt and fresh cracked pepper but the toppings are entirely up to you. Regardless of add-ons, these burgers are crazy good, so I call them Loony Burgers, the soy free, meat free, ridiculously amazing burger.

Loony Burgers
makes 4 or 5 burgers

Ingredients
½ onion, finely chopped
1 medium carrot, peeled and shredded
½ medium beet, peeled and shredded
the leaves from 3 pieces of kale, cut into small ribbons
1 can of black beans, drained and rinsed
1¼ cup cooked barley or other grain, cooked according to package instructions (lentils would make a good substitute for a gluten-free version)
½ cup rolled oats
¼ cup blueberries
½ Tbs. molasses
1 tsp. apple cider vinegar
½ Tbs. tahini
½ tsp. cumin
¼ tsp. finely chopped rosemary
salt and pepper, to taste
1 egg (optional)

In a frying pan over medium heat, sauté the onion in olive oil for 5 minutes until soft. Add the carrots, beets, kale, and a good pinch of salt and sauté for an additional minute. Set aside to cool slightly.

In a large mixing bowl, combine the beans, cooked barley, and oats and use a potato masher to mash everything together until it becomes a sturdy paste. Don’t worry about getting things perfectly smooth. Some remaining whole beans or big chunks will be just fine. Mash in the blueberries until incorporated. Add the cooled, cooked vegetables, the molasses, vinegar, tahini, cumin, rosemary, another good pinch of salt, and some pepper, and use a wooden spoon of a large fork to combine everything together. Taste and add more salt or other seasoning if needed. At this point you can add in a beaten egg (it will help to hold things together) but is not necessary if you want to keep the burgers vegan.

Refrigerate the mixture for 30 minutes. Once cool and firm, divide the mixture into 4 or 5 patties (a kitchen scale works well here to keep them the same size). You can either cook them right away or set them on a parchment lined baking sheet and place them in the freezer. Once frozen, pack the patties into a freezer safe container with a piece of parchment between each patty so they don’t stick. To cook, defrost overnight in the refrigerator or, if you are impatient like me, in the defrost setting of the microwave, and pan-fry in a bit of olive oil until hot and crisp. Assemble on a bun or English muffin with toppings of your choice.

Dark Chocolate Red Wine Cupcakes

“If not on Valentine’s Day, when?” That is the reasoning I usually give myself every year to justify an overabundant consumption of things like chocolate, desserts, and wine on the holiday. Well, I guess do this a little more often than just Valentine’s Day when it comes to the chocolate over-eating – “if not Monday or Thursday or Saturday, then when?” – but besides that, I feel that anyone has the right to indulge in sumptuous things on the most romantic day of the year. Especially when self-purchased/made treats are the only things you have to indulge in.

Slightly bitter that I may be that I generally have a lack of true Valentine’s experiences, I was excited that I had the opportunity to show a little love to my new coworkers this year. To get in the holiday spirit, I baked them up a little something that couldn’t possibly be any more Valentine-y: Dark. Chocolate. Red. Wine. Cupcakes. And who else to concoct such a divine-sounding specimen but the very talented Deb Perelman? I got the recipe from my (signed) copy of the Smitten Kitchen cookbook. I now consider the wine splattered page on which this recipe resides to be the most coveted page of them all.

Believe me people! This cake is insane. It is hard to imagine how a chocolate flavor so intense can fit inside such a dense and fudgy yet surprisingly tender little cake. The flavor of the wine is less pronounced, especially considering that almost an entire bottle goes into the batter, but it is definitely a necessary backdrop. It’s like the butter to a grilled cheese sandwich, not the most apparent component yet still absolutely essential. I used a pinot noir hoping to complement the chocolate with flavors of red berries but I trust Deb that any kind will work fine. And then there is that genius addition of cinnamon that sort of plays off the slight spiciness of the wine and supplements the richness of the chocolate with wakening warmth.

They don’t even really need frosting and are actually quite pretty with just a sprinkling of powdered sugar on their jet-black surface. But, frosting never hurts, right? I went in a bit of a different direction from Deb with the frosting, but kept the same general concept of a tangy, creamy spread. I made a barely sweetened cream cheese icing, lightened with some whipping cream and accented with a little vanilla. That’s all it takes. And just frost with a little schmear – let that cupcake shine.

One of my coworker tasters sent me this email shortly after devouring

“Thanks for the cupcake, lady! Chocolate cake so dark that light could not escape it’s pull…delightful!”

If that doesn’t sound like success, I don’t know what is. So maybe I didn’t walk away with a special valentine this year, but my cupcakes certainly found their matches, and I think that counts for something.

Dark Chocolate Red Wine Cupcakes
From the Smitten Kitchen Cookbook
makes about 30 cupcakes

Ingredients
For the Cakes
2 stick of softened butter
2 cups firmly packed dark brown sugar
2/3 cups granulated sugar
4 eggs
2 cups red wine of choice
2 tsp. vanilla extract
2¾ cups all-purpose flour
1 1/3 cups cocoa powder
½ tsp baking soda
1 tsp baking powder
¾ tsp cinnamon
¾ tsp salt

For the Frosting
8 oz softened cream cheese
¼ cup heavy cream
1½ cups powdered sugar
¼ tsp vanilla extract
a pinch of salt

Preheat your oven to 325 degrees and place cupcake liners in 2 cupcake tins. Beat the softened butter at a medium speed in an electric mixer until smooth. Add the sugars, increase the speed to medium-high, and beat until fluffy. Add the eggs, one at a time, and then add the vanilla. Once everything is incorporated, give the bowl a scrape to loosen up the stuck bits at the bottom.

While things are mixing, sift together the flour, cocoa powder, baking soda, baking powder, cinnamon, and salt in a separate bowl and set aside. Also measure out your red wine.

Add 1/3 of the dry mix to the mixer with the butter and sugar and beat on low until the flour is just incorporated. Then, add in half of the red wine and mix to combine. Continue by adding another third of the dry mix, then the rest of the wine, and finally the rest of the dry ingredients. Mix until the ingredients are incorporated together and the batter is smooth.

Scoop the batter into the muffin tins (about 3 Tbs or a ice cream scoop-full in each) and bake for 25 minute or until a toothpick inserted in the middle comes out clean.

As the cupcakes cook, make the frosting. Using an electric mixer with the whisk attachment, whip up the cream cheese on a medium speed until smooth. Add the powdered sugar, vanilla and salt, and whisk to combine. Increase the speed and slowly pour in the heavy cream. Once added, whip on high for about a minute until the frosting is increased in volume and has the texture of marshmallow fluff. Store in the refrigerator until ready to use.

When the cupcakes are finished baking, invert them onto a cooling rack. Wait until they are completely cool before topping with a small dollop of the frosting or a dusting of powdered sugar. Store in the refrigerator – they will keep well for about 3 days.

Spiced Crispy Chickpeas

It’s funny that now I have a fancy new office job (which is absolutely fab by the way) with a computer and a desk and all that, certain things in my life have become much more important than they ever were before. For instance, I now, for the first time since maybe middle school, have to keep careful track that my bedtime does not extend past 8:00 (and yes, it does make me feel old). I have now also become obsessed with traffic patterns. It is simply amazing to me how traffic can go from insignificant to absolute gridlock in a matter of minutes (generally in the time frame of around 4:46-4:49) and it becomes of absolute necessity to leave the office at precisely 4:30 to prevent an imminent doom of stop-and-go commuting. Has anyone also ever noticed how traffic really seems to have no reason for being, how the worst possible congestion can suddenly end as if 2/3 of the cars evaporated into thin air? And also how people feel a dire need to slow down and stare whenever a cop has someone pulled over, creating a jam large enough to prolong my drive by approximately 15 minutes? Oh, traffic…so perplexing.

But I think the one thing that has climbed near the top of the “aspects of my life of vital importance” list is snacks. When it gets to that moment when my eyes suddenly glaze over from three hours of staring at the computer screen, yet it’s still much to early to justify eating lunch, there is nothing better than a walk to the lunchroom for a snack break. Of course, it helps that my new employer provides a plethora of limitless free and healthy snacks and fresh fruit and bottomless Tazo tea and Starbucks coffee. Each day is like an adventure to see what kind of new snack made it into the selection. White Cheddar Pirate’s Booty? Sure! Potato chips fried in Avocado Oil. Oh yeah! And while I’m at it I’ll take a grapefruit with me for good measure.

However, I have realized that my self-control will, at some point, need to reign in my newfound obsession for prepackaged snacks. I considered signing up for one of these subscription healthy snack boxes where you are sent a new selection of goodies every week. But then I realized that I can pretty much get the components of these things in the bulk section of many nearby grocery stores for much cheaper. And this led to the great epiphany that I should make my own snacks and trail mixes and granola bars so I could cater them to my tastes and know exactly what’s in them. Well, at least that’s the plan for now while the idea’s newness gives me the momentum to follow through. So, to start, I made use of about a 1½ cups of extra chickpeas I had from my latest batch of hummus and turned it into snack that could give potato chips a run for its money after all.

These are crispy chickpeas. They are nothing but chickpeas with a tad of oil and a lot of spices, dried out in the oven until crunchy and nutty. That’s it. Dead simple. It sounds so boring when you thing that its nothing but a shriveled, dried out bean but you must eliminate those thoughts. This may be a healthy, fiber and protein filled snack but, in this form, the chickpeas masquerade as the guilty pleasures from the vending machine. And they don’t have to necessarily be used own their own as mere snacks. They are amazing on salads and soups and curries and all sorts of dishes. You can mix them with other roasted nuts, seeds, and dried fruits for trail mix or serve them on a cheese and charcuterie platter. And you can feel free to play around with the spices. Make a sweet cinnamon sugar version, or Texas bbq, parmesan rosemary, or even curry. You can pretty much replicate any snack flavor out there!

Do you sense a bit of excitement here?

Yes, I do realize I’m probably the last person to catch on to this trend (per usual) but hey, better late than never, right? I’m afraid to say that there may be a chickpea epidemic about to erupt in my house though I suppose there could be many many worse things than that.

Spiced Crispy Chickpeas

Ingredients
1 15-oz can chickpeas, drained, rinsed, and air-dried on a clean towel (you could also use 1½ cups fresh cooked chickpeas, if you happen to have them available)
1 Tbs. olive oil
¼ tsp. cumin
¼ tsp. coriander
¼ tsp. ground ginger
¼ tsp. smoked paprika
½ tsp. sea salt

Preheat the oven to 425 degrees. Toss the dry chickpeas with the olive oil and the spices until they are coated evenly. Spread them out a baking sheet. Roast in the oven for 30-35 minutes, shaking the pan periodically, until the chickpeas are lightly browned and crispy all the way through (to test for crispiness, remove a few from the oven and let them cool for a moment before tasting). Let them cool completely before storing in an airtight container. But really, they won’t last that long.

Roasted Carrot Salad

Well, I’m going to be straight with you right now. When the ball dropped and the New Year arrived, I was one of those people. Yes, one of the many who woke up on New Year’s Day, opened the refrigerator, and gazed upon the entirety on my next two days’ meals lined up in neat, multicolored rows of bottled, organic, detox juice. I abandoned my beloved jammy toast for a bottle of liquid celery and romaine lettuce. Mmmmm…breakfast.

So, was it worth it?

I’m not quite sure actually. I didn’t really wake up at the end up it all feeling like I had a glowing sparkly aura around my body. Perhaps I had a little more energy but I also had a nasty cold at the time so that marred the results a bit. I think that the greatest benefit was gaining awareness of so much mindless snacking. While detoxing, I would walk through the kitchen and make the motion to grab a handful of cereal or stick my finger into the peanut butter jar a spoonful of peanut butter before stopping myself in the act of sheer bad habit.

Also, post-detox, I eased myself back onto solid foods and stuck to mostly vegetables, fruits, ancient grains, and nuts before adding gluten, meat, and cow dairy. And it was with this stage of the process that I gained the most realization…I really missed vegetables. A lot. Working at a restaurant for 8 months, I was on a steady diet of bread and more bread with minimal green foods. At college, I used to have so much fun making up these funky, unique salads of sorts with fresh market product and it all kind of stopped in that “newly graduated” stage of life. So maybe it was something in the juice, but all the sudden I found myself pulling a new salad-y recipe from a long-neglected portion of my brain and came up with a dish that really did make me feel all sparkly and cleansed like I had hoped.

This one takes a slight nod from a roasted beet and crunchy radish salad I had at Arbutus Restaurant in London. Instead, I brought in the earthy sweetness from roasted rainbow carrots and offset it with the slight pepperiness and crispness of red cabbage. The strage part is that I roasted the cabbage. I’ve never done this before – it was kind of a spur of the moment decision – but it resulted in something that was completely unexpected and delightful. Who new that roasting ribbons of cabbage makes for a mixture that is simultaneously tender and sweet but also savory and chip-like? Trust me, you’ll be fighting others off to get the crunchy burnt pieces. The sprinkle of pistachios and goat cheese adds yet another contrasting dimension of sweet, salty, and tangy and the vinaigrette just ties it all together.

So, if the juice detox was the cause of the creation of this salad, I suppose I can say it was worth it. Otherwise, eh, I’m not totally convinced; my general consensus is that I just had two days where I peed a whole lot more than normal and had a flatter stomach for about 24 hours. I mean, sure it was nice to rid myself of accumulated crap at the beginning of the year but I think for the rest of the year, I’ll stick to plain and simple veg and tasty salads, thank you very much.

Roasted Carrot Salad for One
Ingredients
5-6 rainbow carrots, washed and halved lengthwise
¼ head of red cabbage, core removed and cut into ¼ inch ribbons
1 Tbs. olive oil
red pepper flakes (optional)
1 Tbs. roasted salted pistachios
goat cheese
salt and pepper
champagne vinaigrette

(I don’t have an exact recipe but find that the best vinaigrette is 3 parts olive oil, 1 part vinegar, and a small amount of Dijon mustard, honey or any other sweetener that you like, salt, and pepper, to taste. Whisk to combine.)

Preheat the oven on 450 degrees. Toss the carrots with ½ Tbs of the olive oil, salt, pepper, and a pinch of red pepper flakes and lay them evenly on a baking sheet. In a bowl, toss the cabbage with the remaining olive oil, salt and pepper, and use your hands to coat all of the cabbage evenly with the oil. Set aside. Place in the baking sheet with the carrots in the oven for ten minutes. Remove and add the cabbage to the same pan along with the carrots. Place back in the oven for 15 minutes, occasionally flipping the carrots and stirring the cabbage until both are crisp tender.

Arrange the cabbage and carrots on a plate. Sprinkle the pistachios and as much goat cheese as you desire overtop. Finish with a drizzle of your vinaigrette.