This is NOT a Valentine’s Day Cake

Ok, yes, well maybe it looks like that. But trust me, it’s not.

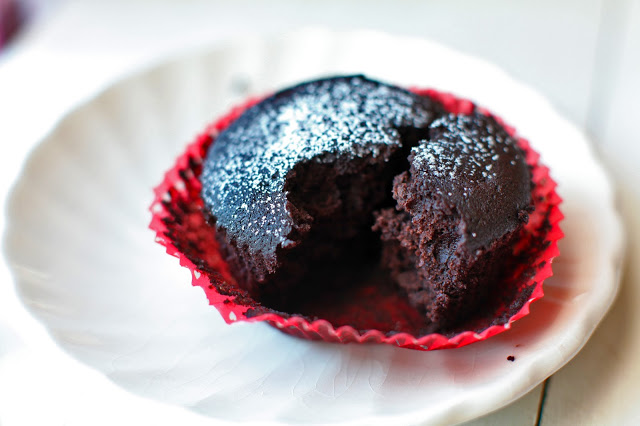
This is Julia Turshen’s ultra luxurious and wicked simple coffee-scented chocolate cake. It’s filled with cherry preserves, drenched in a sour cream chocolate frosting, and topped with chocolate amaretti cookies, gold sprinkles, and freeze-dried strawberries. And it just so happens to be shaped like a heart, deal with it.

So why is this chocolate heart cake not a Valentine’s Day cake? Because Valentine’s Day puts people on edge and I don’t want that energy associated with this cake. Single people feel left out for the entire day, couples worry about making sure they are “doing enough,” and if you’re not fretting over it, you’re enraged by made-up-holiday consumerism. It’s ridiculous and nobody wins, especially when you’re me at age 13 and just bought a pair of heinous red suede Nike sneakers with hearts on them because you’re stupidly obsessed with this holiday for some reason. So that is why this is not a Valentine’s Day cake.

However, being in the shape of a heart, and being such a sweet and tasty and happy cake, maybe when we eat it we can remind ourselves of the importance of love and compassion. And not just for this one day, but for every day and everyone. A life of love, towards others, towards the planet, towards our own self, is always something to be happy about. And a definite cause for cake, especially this magical little cake. So tell people you love them, do something that makes a difference, and don’t be afraid to even treat yo self, because why not. Happy…er…um… Day. Yes, Happy Day… or whatever. Just make this cake.

Not a Valentine’s Day Cake / Quasi Black Forest Cake
Slightly adapted from Julia Turshen’s Small Victories

For the Cake
1¼ cups all-purpose flour
1 cup sugar
¾ cup Dutch-processed cocoa powder
1 tsp. baking soda
1 tsp. baking powder
½ tsp. kosher salt
1 stick unsalted butter, melted and cooled
2 eggs, lightly whisked
1 cup strong coffee, at room temperature
1 cup buttermilk
1 tsp vanilla extract

For the Frosting
¾ cup semisweet chocolate chips
¾ cup room temperature sour cream
1 Tbsp maple syrup
1 tsp. vanilla extract

To assemble and decorate
½ cup cherry preserves
crushed amaretti cookies
freeze dried strawberries (optional)
gold sprinkles (optional)

Preheat the oven to 350 degrees. Butter two 8-inch cake pans (or one heart pan) and line the bottom with parchment paper. In a large mixing bowl, whisk together the flour, sugar, cocoa powder, baking soda, baking powder, and salt. Add in the melted butter, eggs, coffee, buttermilk, and vanilla. Whisk until combined.

Divide the batter between the two pans or one pan if that’s all you have. Bake for 30 minutes (40-45 if you’re just using the one pan) until a toothpick inserted in the center comes out clean. Place on a cooling rack and once completely cool, remove from the pan and peel off the parchment paper. If you baked in just one pan, horizontally cut the cake in half after it cools.

While the cakes are baking, make the frosting. Set up a double boiler by placing a mixing bowl over a simmering pot of water without letting the bowl touch the water. Add the chocolate chips to the bowl and stir until completely melted. Remove the bowl from the pot and stir in the sour cream, maple syrup, and vanilla. Refrigerate for at least an hour.

To assemble the cake, spread the cherry preserves over half and place the other half on top. Use a small offset spatula to spread 1/3 of the frosting over the top and sides of the cake. Refrigerate for 15 minutes until the frosting sets a bit. This keeps the final layer of frosting from picking up cake crumbs. Spread the rest of the frosting over the cake and refrigerate at least another hour. Serve with the garnishes sprinkled overtop.

Funfetti Millefeuille


Spring, at last! Though it was a relatively tame winter (not including that snow storm I happened to miss out on) the sun and mild weather already feels rejuvenating, bringing with it a shift in the winds, the arrival of a new phase.

I realize that I mention this feeling of “rebirth” and starting another revolution of an ever-evolving cycle of life maturation each time spring comes around but it truly does happen. I mean, look at the evidence. 3years ago in the spring, a year out of college and just finding my first “real job”, I was going through a new phase of acclimation. 2 years ago I entered a major phase of personal growth and trying things that I was maybe too scared to try beforehand. And 1 year ago, the spring was the start of a lesson in healing and a long and slow process of realizing that hurt and sadness do indeed go away.


So what about this year? When spring arrived I still wasn’t sure yet. Unlike other years, this spring didn’t start off with a huge change or clear-cut moment defining the beginning of a new phase. That is, until I came across this quote by Emily Dickinson on Instagram of all places.

“The soul should always stand ajar, ready to welcome the ecstatic experience.”

That’s when I realized that the phases of my life these past three years and what I’ve learned from them have all been leading up to this, the stage where I really begin to just start living. It’s almost as if I’ve been spending my time getting to know who I am, deep down to the core and now that I’ve done that, I am free to take risks, be a bit reckless, and just let myself go without risk of losing sight of the self. And that made me excited! So excited I couldn’t help but make a 4 layer cake complete with rainbow sprinkles for Easter dessert this past weekend. Because I couldn’t possibly claim to be living it up to the fullest extent if rainbow sprinkles weren’t involved, amiright. Thus, Funfetti Millefeuille.


Millefeuille, a classic French dessert meaning “thousand leaves,” is composed of alternating layers of crispy and flaky puff pastry with a creamy custardy filling and a layer of icing on top. It’s best eaten immediately if it’s the crispy texture you crave, but I found it really nice once it softened too, almost éclair-like. This particular version, filled with a rainbow sprinkle-infused sweet mascarpone filling and decorated just as frivolously, is probably as far as you could go in terms of bastardizing the original version, probably causing Julia Child to roll over in her grave with each layer added. But do I care? Nope! Because this looks like springtime and tastes like birthday cake with a sort of cavity-inducing sweetness that can only be complemented by a cup of strong black coffee. So, if it’s ecstatic experiences I‘m opening my soul to this year, well, I’d say I’m off to a pretty good start.


Funfetti Millefeuille
Recipe from Tasting Table

Ingredients

For the Pastry
1 17.3 oz package (containing two sheets) of puff pastry thawed in the refrigerator and cut in half, lengthwise, creating 4 rectangles of puff pastry.
2 Tbs. powdered sugar

For the Filling
2 cups mascarpone cheese
½ cup powdered sugar
1 tsp. vanilla extract
1/3 cup heavy cream, whipped
½ cup rainbow sprinkles

For the Icing
1 cup powdered sugar
2 Tbs. milk
2 Tbs. butter, melted and cooled
2 tsp. corn syrup
red, blue, green, and yellow food coloring

Preheat the oven to 425 degrees. Line two baking sheets with parchment paper. Place 2 rectangles of the puff pastry on each baking sheet and prick them all over with a fork. Use a fine-mesh sieve to dust them on each side with powdered sugar. Bake until golden, 12-15 minutes. Remove from the oven and use another baking sheet to press down lightly on the pastry to flatten them some. Once flattened, transfer the pastry to a cooling rack to cool completely.

Make the filling by combining the mascarpone cheese, powdered sugar, vanilla extract, and whipped cream in a bowl until well blended. Refrigerate until ready to use.

To make the icing, combine the powdered sugar, milk, butter, and corn syrup in a bowl. In 4 small bowls place 1 Tbs. of the icing. Add 2-3 drops of one color of food coloring to each bowl of icing and mix well. You’ll end up with a tablespoon of icing for each color. Transfer each of these to a separate sandwich bag and seal shut. Leave the rest of the white icing in a bowl until ready to use.

To assemble the millefeuille begin by adding the sprinkles to the filling and mix well. Transfer to a piping bag or a gallon plastic bag with one corner snipped off. Place one piece of the puff pastry on your serving platter. Pipe a third of the filling onto the pastry and spread evenly with a knife or offset spatula. Repeat this step 2 more times. Add the final piece of pastry to the top and use an offset spatula to spread the white icing on the top. Snip the very tip of the bottom corner of each bag of colored frosting and work quickly to pipe thin lines across the top of the cake, alternating colors. Once you’ve covered the entire length of the cake with stripes of colored frosting, use a toothpick and drag the tip across the length of the cake. Do this, alternating direction each time, until you’ve reached the other side of the cake. Slice crosswise to serve.


A Year Ago Today: Loss, Remembering, and Bonnie Butter Cake

On my dad’s side of the family, I don’t think a birthday went by without a celebration at my grandma’s (well, I called her Nanaw) house. If I close my eyes and concentrate just enough, I swear I can almost take myself back there. From turning into her long gravel lane and up to the small house on the hill to the end of the boisterous family affair full of jokes and laughs, I can envision every detail as if it happened yesterday.


---

The candles are lit, the lights go out, all sing, then darkness. If it’s my birthday, the July heat settles thickly in the room, occasionally interrupted by a pathetic breeze that drifts through and rustles the thin white cotton curtains. The dulled sounds of… maybe it’s Jeopardy?… drift in, unwatched, from an adjacent room. Someone switches the light back on and lifts the darkness.

My parents, my sister, aunts, uncles, cousins, and Nanaw all reappear, crammed around the floral vinyl tablecloth-covered kitchen table, most likely doubling up in the chairs to make room for us all. It’s about that time that the all too familiar smell of freshly extinguished birthday candles hits my nose. That smell, Pavlovian in its effect, triggers the only response I know: prepare for cake. And if it’s a birthday at Nanaw’s house, we’re eating Bonnie Butter Cake.


My Aunt takes charge of slicing the cake, divvying it out onto paper plates alongside a massive scoop of Edy’s vanilla ice cream. Nanaw passes out cups of Coke or ginger ale. There’s a 97% chance that it went flat about 2 weeks ago but I drink it anyway. The cake is the same as it’s always been and I wouldn’t have it any other way. It’s buttery, as its name implies, sweet, and fluffy but the real star is the caramel icing, the sort that gets an ethereally thin crispy and flaky shell that shatters as my fork breaks into it. It’s an intense toffee sort of flavor and needs the cake and ice cream to mellow it out a bit.


If I’m lucky, there will be a few slices left that I can wrap up to take home with me. I’ll nibble on it bit by bit, drawing out its existence as long as I can. In the meantime, all of us, dazed in a post-cake coma, continue chatting around the table. I hear stories from my dad and his siblings. We all laugh as they regale us with tales of the antics they got up to as kids growing up on a dairy farm. Nanaw, the last to sit down with her slice of cake and ice cream, sits by quietly, shaking her head occasionally at the rowdy rest of us. We continue for hours, long after the residual bits of ice cream have melted on our plates, yet the sweet taste of Bonnie Butter Cake seems to linger on the palate, a taste I’ll never forget.


---

When Nanaw died one year ago today, I worried that my mind would not be able to move past the memories I had of her in her final years. She was still the same person, of course, but old age and illness took their tolls. But time went on and before I knew it those final images trickled away and the happier memories returned. Memories of the woman who watched as I learned how to ride a bike in her backyard, who watched over me during the summer while my parents were at work, withstanding the countless hours of The Price is Right I put her through. The woman who let me sit in the middle of her old white pickup truck and shift gears when she pressed the clutch (which probably was not legal), who let my cousins and I parade through her garden to find rotten vegetables to make our “witch’s brew” in a 5-gallon bucket. The woman who made us Bonnie Butter Cake year after year because we all knew it wouldn’t really feel like a birthday without it.


Other than knowing that Nanaw made this cake for more family birthdays than I can remember, I hardly know any more about it. Where did she get the recipe? When was the first time that she made it? Was it her favorite cake? I may not ever know the answers, but rather than dwell on the questions I can no longer ask, maybe remembering what I do know is the most important thing. I know that Nanaw lives on in the blood that runs through my veins, in my memories that I have and share with others, and through the things she’s left behind, things like a cake recipe scratched onto an old bit of paper.


Bonnie Butter Cake
Makes one 2-layer cake

Note: the ingredients list for the cake and the entire recipe for the caramel icing is written exactly as it is on my grandmother’s hand-written recipe. Instructions for making the cake were not included so I wrote those on my own.

For the Cake
2/3 cup butter or margarine
1¾ cups sugar
2 eggs
1½ teaspoon vanilla
3 cups Softsilk cake flour (I actually used King Arthur)
2½ teaspoon baking powder
1 teaspoon salt
1¼ cups milk

Preheat the oven to 350 degrees and thoroughly butter 2 cake pans. Cream the butter and sugar together in an electric mixer for 4 minutes on medium speed until it’s light and fluffy. Add the eggs, one at a time, scraping down the sides and the bottom of the bowl after each. Add the vanilla and mix until combined.

Add the flour, baking powder, and salt into a separate bowl and use a whisk to combine. With the mixer on a medium-low speed add a third of the flour mixture. Once combined, add half of the milk. Add another third of the flour, then the rest of the milk, and finally the last of the flour. Turn to a medium speed to fully incorporate for about 15 seconds. Divide the batter between the two cake pans and bake for 30-35 minutes until golden and a toothpick inserted in the center comes out clean. Let the cakes cool in the pans until just warm then transfer to a cooling rack to finish cooling completely before frosting.

For the Caramel Icing

"Mix together thoroughly in saucepan, 1½ cups brown sugar (packed in cup), 3/8 cup milk (¼ cup plus 2 Tbsp.), 3/8 cup shortening, ¼ tsp. salt. Bring slowly to a full rolling boil, stirring constantly, and boil for 1 minute. Remove from heat and beat until lukewarm. Add ¾ tsp. vanilla. Continue beating until thick enough to spread. If icing becomes too thick to spread, add about 1 tsp. cream. Icing for 2-layer cake."

Chocolate Krantz Cake

Sitting at home, in the middle of a Tuesday afternoon, I am in the midst of what is my third bout of illness within a two-month period. This most recent is believed to have been picked-up in the gym somewhere – so much for trying to get back into healthy habits.

With that being said, my winter days of late have been filled with more soups that I really care to recount at this point since they are all starting to taste the same.  Instead I want to tell you about a wonderful chocolate bread/cake I made a month ago for Christmas, a newer holiday tradition in the family. I would kill for a piece of it right now but the effort required to make it is probably about 25 times more than what I have available at the moment so I’ll make do with dreaming about it over the next few episodes of Serial. Sigh.

But anyway, let’s talk about chocolate krantz cake. The recipe comes from Yotam Ottolenghi’s Jerusalem. It’s the only recipe I have made from the book (which I’ve had for about 2 years) but this recipe alone makes having the hard copy worth it. It starts out like a recipe for brioche but then the dough is filled with a thick chocolate paste, shaped into a braid, and, once baked, is doused in a sweet syrup. The result straddles the fine line between bread and cake. The syrup fuses with the chocolate filling, turning it into something kind of resembling chocolate frosting. It’s definitely sweet, but not cloyingly so. But the bread dough gives it a little more heft than a cake, therefore making it much more justifiable as breakfast food or an afternoon snack. But it works just as well as dessert too.

Better yet, the bread keeps wonderfully, which is nice considering that it takes a decent amount of time (2 days!) and effort to make. Can’t lie to you about that but, trust me, it’s worth it. I was still eating slices about 5 or 6 days after making it and they were just as good, if not better, with age. Cooled fresh loaves can also be wrapped tightly in foil and tucked into a plastic bag and frozen for a few months.

Perhaps this may not be quite the right recipe for all of the January gym-goers – because you are either being healthy or are also suffering the gym plague like me – but just you wait. Some day this winter the weather man is going to tell you all about an impending storm and if you plan it just right and start the night before, you’ll be pulling hot krantz cake out of the oven on your snow day. And I can’t imagine too many things nicer than that.

Chocolate Krantz Cake
From Yotam Ottolenghi’s Jerusalem
Make 2 loaves

Please note that you must start preparing the cakes the night before you wish to bake them. Though the cakes themselves don’t take too much time for the physical construction, there is a lot of idle time. But, as mentioned above, it’s well worth the wait.

Ingredients

For the dough
4¼ cups all-purpose flour
½ cup sugar
2 tsp fast-rising active dry yeast
zest of a small lemon
3 eggs
½ cup water
¼ tsp. salt
2/3 cup room-temperature unsalted butter, cut into cubes
unflavored oil, for greasing

For the chocolate filling
½ cup powdered sugar
1/3 cup dutch-process cocoa powder
4½ oz melted dark chocolate
½ cup melted unsalted butter
1 cup coarsely chopped pecans
2 Tbs. sugar

For the syrup
2/3 cup water
1¼ cups sugar

Begin by making the dough. Place the flour, sugar, yeast, and lemon zest in the bowl of a stand mixer with the dough hook attached. Mix for about a minute to combine. Add the eggs and the water. Slowly increase the speed to medium and let mix for about 3 minutes, stopping the mixer as needed and pushing some of the flour into the center of the bowl until the minute comes together. With the mixer still on medium, add the salt and then the butter, a few cubes at a time, until all are added. Keep the mixer going for about another 10 minutes, scraping down the sides of the bowl periodically and adding a bit more flour if it doesn’t seem to want to form into a ball.

When the dough it ready, it will have formed into a ball and be smooth and shiny and elastic. Place it in a bowl brushed with a little bit of oil to keep it from sticking. Cover the bowl with plastic, and place in the refrigerator overnight.

The next day, you can assemble and bake the cakes. Begin by greasing two 9x4 inch loaf pans and line them with parchment paper. Set aside. Then make the chocolate filling by combining the powdered sugar, cocoa powder, melted chocolate, and melted butter in a bowl until you have a smooth, spreadable paste. Also set aside.

Remove the dough from the fridge and divide in half. Place one on your counter and the other back in the fridge for the time being. Lightly dust the counter with flour and roll the dough into a 15x11 inch rectangle. Position it so that the shorter edge is closest to you. Spread half of the chocolate filling onto the dough, leaving a ¾ inch border on all sides. Sprinkle with half of the pecans and half of the granulated sugar. Brush a little bit of water on the side that is furthest from you. Then, starting at the end closest to you, tightly roll up the dough, pinching to seal it shut once you reach the end. Place the log of dough on the counter so that seam side is down and one end is facing you.

Now time for the slightly tricky part. Use a serrated knife to cut off the ends on each side of the log of dough. Now, running the knife from end to end, cut the log in half, lengthwise. It helps to make long shallow cuts, repeatedly running the knife from top to bottom and gently separating the two sides. Once cut through, lay the two sides so they are both cut side up. Take the end that is furthest from you on the left half and place it on top of the end of the right half, gently pressing them together. Now “braid” the loaf by taking the right half (the one underneath) and placing in overtop the left half, and then doing this once more until the two bottom ends meet up and can be sealed together. It doesn’t have to be perfect so long as the filling of the cake is exposed at the top and both ends are somewhat secure. Lift the cake into the pan and loosely cover with a clean dishtowel. Repeat with the remaining dough and filling.

Preheat the oven to 375 degrees and while that heats let the loaves rise for 1-1.5 hours, until increased in size by about 20%. Place the two loaf pans in the oven and bake for 30-35 minutes until golden. While the cakes bake, make the syrup. Combine the water and sugar in a saucepan and bring to a boil. Once the sugar dissolves remove from the heat and let cool slightly. When the cakes are finished, place them on a cooling rack and immediately use a pastry brush to disperse the syrup over the cakes until all of the syrup is used up. It will seem like a lot, but will all eventually get soaked into the cake. After an hour remove the cakes from the pans and let cool completely before serving.

Dark Chocolate Red Wine Cupcakes

“If not on Valentine’s Day, when?” That is the reasoning I usually give myself every year to justify an overabundant consumption of things like chocolate, desserts, and wine on the holiday. Well, I guess do this a little more often than just Valentine’s Day when it comes to the chocolate over-eating – “if not Monday or Thursday or Saturday, then when?” – but besides that, I feel that anyone has the right to indulge in sumptuous things on the most romantic day of the year. Especially when self-purchased/made treats are the only things you have to indulge in.

Slightly bitter that I may be that I generally have a lack of true Valentine’s experiences, I was excited that I had the opportunity to show a little love to my new coworkers this year. To get in the holiday spirit, I baked them up a little something that couldn’t possibly be any more Valentine-y: Dark. Chocolate. Red. Wine. Cupcakes. And who else to concoct such a divine-sounding specimen but the very talented Deb Perelman? I got the recipe from my (signed) copy of the Smitten Kitchen cookbook. I now consider the wine splattered page on which this recipe resides to be the most coveted page of them all.

Believe me people! This cake is insane. It is hard to imagine how a chocolate flavor so intense can fit inside such a dense and fudgy yet surprisingly tender little cake. The flavor of the wine is less pronounced, especially considering that almost an entire bottle goes into the batter, but it is definitely a necessary backdrop. It’s like the butter to a grilled cheese sandwich, not the most apparent component yet still absolutely essential. I used a pinot noir hoping to complement the chocolate with flavors of red berries but I trust Deb that any kind will work fine. And then there is that genius addition of cinnamon that sort of plays off the slight spiciness of the wine and supplements the richness of the chocolate with wakening warmth.

They don’t even really need frosting and are actually quite pretty with just a sprinkling of powdered sugar on their jet-black surface. But, frosting never hurts, right? I went in a bit of a different direction from Deb with the frosting, but kept the same general concept of a tangy, creamy spread. I made a barely sweetened cream cheese icing, lightened with some whipping cream and accented with a little vanilla. That’s all it takes. And just frost with a little schmear – let that cupcake shine.

One of my coworker tasters sent me this email shortly after devouring

“Thanks for the cupcake, lady! Chocolate cake so dark that light could not escape it’s pull…delightful!”

If that doesn’t sound like success, I don’t know what is. So maybe I didn’t walk away with a special valentine this year, but my cupcakes certainly found their matches, and I think that counts for something.

Dark Chocolate Red Wine Cupcakes
From the Smitten Kitchen Cookbook
makes about 30 cupcakes

Ingredients
For the Cakes
2 stick of softened butter
2 cups firmly packed dark brown sugar
2/3 cups granulated sugar
4 eggs
2 cups red wine of choice
2 tsp. vanilla extract
2¾ cups all-purpose flour
1 1/3 cups cocoa powder
½ tsp baking soda
1 tsp baking powder
¾ tsp cinnamon
¾ tsp salt

For the Frosting
8 oz softened cream cheese
¼ cup heavy cream
1½ cups powdered sugar
¼ tsp vanilla extract
a pinch of salt

Preheat your oven to 325 degrees and place cupcake liners in 2 cupcake tins. Beat the softened butter at a medium speed in an electric mixer until smooth. Add the sugars, increase the speed to medium-high, and beat until fluffy. Add the eggs, one at a time, and then add the vanilla. Once everything is incorporated, give the bowl a scrape to loosen up the stuck bits at the bottom.

While things are mixing, sift together the flour, cocoa powder, baking soda, baking powder, cinnamon, and salt in a separate bowl and set aside. Also measure out your red wine.

Add 1/3 of the dry mix to the mixer with the butter and sugar and beat on low until the flour is just incorporated. Then, add in half of the red wine and mix to combine. Continue by adding another third of the dry mix, then the rest of the wine, and finally the rest of the dry ingredients. Mix until the ingredients are incorporated together and the batter is smooth.

Scoop the batter into the muffin tins (about 3 Tbs or a ice cream scoop-full in each) and bake for 25 minute or until a toothpick inserted in the middle comes out clean.

As the cupcakes cook, make the frosting. Using an electric mixer with the whisk attachment, whip up the cream cheese on a medium speed until smooth. Add the powdered sugar, vanilla and salt, and whisk to combine. Increase the speed and slowly pour in the heavy cream. Once added, whip on high for about a minute until the frosting is increased in volume and has the texture of marshmallow fluff. Store in the refrigerator until ready to use.

When the cupcakes are finished baking, invert them onto a cooling rack. Wait until they are completely cool before topping with a small dollop of the frosting or a dusting of powdered sugar. Store in the refrigerator – they will keep well for about 3 days.