Chocolate Olive Oil Zucchini Muffins

Living this suburban, just-outside-the-city-but-still-metro-accessible sort of life is pretty great but summer has a tendency to call me home. Home in the summer is a sigh of relief. It reminds me that there is a place in the world where I don’t have to put on appearances, where simple pleasures always exist. I can close my eyes and everything I hear, smell, and feel floods me with waves of nostalgia. A symphony of cicadas, a dozen or so mosquito bites on the ankles, the humid and hot air mingling with the smell of sunbaked grass and acrid tomato plants. If I could spend the rest of my life standing barefoot under the sun, a glass of iced tea in hand, watching that garden grow, it would certainly be a happy life.

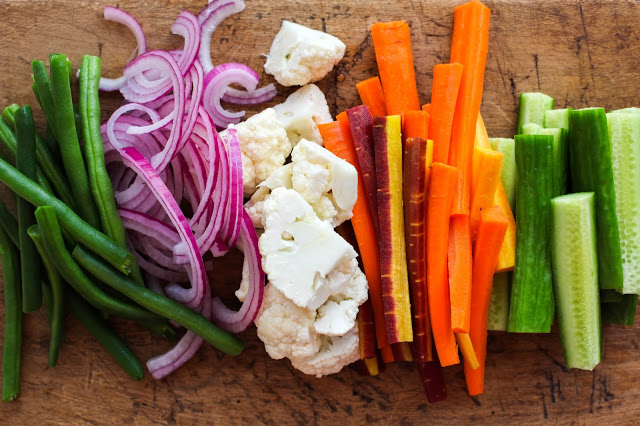
But time is fleeting and just as I start to settle into the simpler ways of life at home, it’s time to head back to suburbia. But at least I’m usually laden with bags of fresh green beans, tomatoes, squash, and zucchini. Always so much zucchini.

And when there’s an excess of zucchini, quick breads are not far away.

I tried out a new recipe from Tara O’Brady’s book Seven Spoons. I haven’t yet had the chance to explore the book in too much depth but from the looks of it, the book is a treasure trove of delightful recipes that I can’t wait to try. But I can say that the chocolate olive oil zucchini muffin recipe is a definite win. These muffins have quite the flavor profile. The chocolate flavor is definitely there, but not in a way that makes you think you are simply eating a chocolate cupcake. It more so brings about this deep and earthy cocoa taste that pairs up nicely with the grassy component of the olive oil and the zucchini. Chocolate chunks and toasted walnuts bulk up the muffins providing a good crunch and chew to juxtapose the ultra moist aspect of the muffin itself.

I made 2-dozen muffins a few days in advance for an upcoming family reunion (they were a hit!) and I found that they froze really well too so you can stash several of them away for a day where a little taste of home is just what you need.

Chocolate Olive Oil Zucchini Muffins
Makes 24-28 small muffins
Recipe from Tara O’Brady’s Seven Spoons

Ingredients
1½ lbs zucchini
1½ cups all-purpose flour
1½ cups whole wheat four
½ cup cocoa powder
1½ tsp. baking soda
1 tsp. baking powder
1½ tsp. salt
1 cup toasted and chopped walnuts
8 oz. chocolate chunks
½ cup olive oil
1 cup buttermilk
2 eggs
¾ cup granulated sugar
½ cup packed light brown sugar
2 tsp. vanilla

Preheat the oven to 350 degrees and place muffin liners in two muffin tins. Using the large holes of a grater, grate the zucchini onto a clean kitchen towel. Once grated, place another towel overtop and press down to squeeze out some of the moisture. Let sit for 15 minutes and then transfer the zucchini to a bowl and set aside.

In a large bowl, mix the flours, cocoa powder, baking soda, baking powder, salt, walnuts, and chocolate chunks together. In a different bowl, whisk together the olive oil and the buttermilk. Whisk in the eggs, sugars, and vanilla and finally stir in the zucchini. Pour the wet ingredients into the bowl with the dry ingredients and gently stir until just combined. Do not overmix.

Divide the batter between the muffin tins. I filled each so there was about a half inch of space between the batter and the top of the tins. Place in the oven and bake for 17-19 minutes until a toothpick comes out clean when inserted into the muffin. Let the muffins cool in the pan for 10 minutes and then transfer them to a wire rack to cool completely.

Grilled Corn Carbonara

Following tradition, I made my once yearly trek to Boston and spent a fabulous 4th of July weekend with my sister. At the airport I stocked up on all of my in-flight essentials (mentos, popcorn, sparkling water, food magazines) and during the whole 55 minutes of the flight, I flipped through the most recent issue of Food and Wine Magazine, the America’s Greatest Chefs Issue. The bio and recipes from Tim Maslow caught my eye immediately, not only because his restaurant Ribelle is located in Boston but also because he included a recipe for a corn carbonara pasta dish. “How intriguing!”  I thought as the pilot announced our final descent and I stowed the magazine away in my carryon bag.

Now this is the part of the story where you would expect me to go and dine at Ribelle and try the restaurant’s renowned food for myself, and maybe even meet the chef in person where I would tell him how I just read his bio earlier that day. But that’s not what happened. We instead went to Giulia (again) for one of the best meals I’ve ever eaten (again). But I digress. So, although a trip to Ribelle was pushed to the “next time” agenda, that corn carbonara recipe kept nagging at me somewhere in the back on my mind saying, “make this NOW!”

So I did.

This carbonara goes against all rules that define carbonara. It has no dairy and it has no egg but instead gets an ethereally smooth and creamy texture from a sauce made of straight-up corn puree. I added an extra step as well and grilled the corn first to add a bit of a smoky and caramelized flavor. The combination of the sweet corn sauce with salty bacon, shallot and garlic and a specialty cracked pepper fettuccine that I found at the farmers market made for a flavor that is the essence of summer in one comforting and indulgent bite. Maslow pairs his version with jumbo lump crabmeat, but I left it out. However that or grilled scallops or some roasted shrimp would all be welcome additions. Pair with a simple salad or some steamed asparagus and you’ll be living the good life for sure!

Grilled Corn Carbonara
Serves 4-6
Adapted Tim Maslow via Food and Wine Magazine

Ingredients
8 ears of corn, shucked
1 lb spaghetti, fettuccine, or linguine
2 Tbs. olive oil or butter
¼ lb bacon, cut into a small dice
2 shallots, minced
2 cloves of garlic, thinly sliced
1 Tbs. lemon juice plus the zest for serving
salt and pepper
olive oil, smoked paprika and parmesan, for serving

Lightly brush the corn with olive oil and grill over medium hear either on an indoor grill pan or an outdoor grill. Rotate frequently until lightly charred on all sides. Remove and set aside to cool slightly.

Using a sharp knife, cut the kernels off the corncobs making sure to scrape all of the juice and pulp from the cobs. Transfer the kernels and corn juice to a blender and blend on high speed until you have a smooth puree. Thoroughly strain through a fine mesh sieve and set the puree aside.

Bring a large pot of salted water to a boil and cook the pasta until al dente. Once ready, reserve 2 cups of the cooking water and drain the pasta. Set this aside as well.

In the same pot used for the pasta, heat the olive oil or butter over medium. Add the bacon and cook until crisp, about 7 minutes. At this point you can discard a bit of the grease by mopping up with a paper towel, if desired. Add the shallots and garlic and cook, stirring constantly, until soft, about 3 more minutes.

Add in the pasta, the corn puree, 1¼ cups of the reserved water, and the lemon juice. Cook over a medium heat, while tossing with tongs, until the sauce is thick, 3-5 minutes, adding more of the pasta water if needed. Season with salt and pepper to taste. Serve in bowls with a drizzle of olive oil, freshly grated parmesan, and a dash of smoked paprika. 

Quick Pickled Vegetables

People always told me that time will start to go faster the older you get.

They were right.

Maybe it’s my quarter-century crisis coming 1 month early but lately I have felt more than ever how fleeting time can be, and it has maybe put me in a bit of a funk. I’m lucky to say that the last 12 months of my life have been some of my best. I experienced a lot of “firsts”, went through some really strong emotional states, both wonderful and terrible, welcomed new people into my life, and then lost some. 

So much happened, including a lot of growth, and it’s terrifying how it all feels condensed into this brief flicker. How is it that a period of such importance passed in what feels like a snap of my fingers? If I had been more present, could I have prolonged that feeling of time? Would I still be where I am right now?

Like I said, quarter-life crisis is real.

With all of that in mind though, I have felt more than ever how important it is to be living in the moment. I want to savor life for all that it is worth and be more mindful and aware about how I am growing and feeling during each new experience. Whether I’m learning a new skill, or doing something that scares me, or simply taking time to be introspective, I hope for each day to end having been lived well and with purpose and a positive mind and spirit.

Food, in the way it initiates the awareness of all senses and inspires learning through creation, somehow tends to expand that feeling of time. Which brings me to these pickles. Lately, I’ve been more and more craving the tangy, briny taste of pickled anything. I’ve been putting capers on my omelets, cornichons on my sandwiches, olives on just about everything else. When I came across the recipe for quick pickled vegetables in Alice Waters’ The Art of Simple Food, it seemed like just the right thing for my current frame of mind.

It’s a pickle that can be created and eaten in the same day, providing a fun daytime diy project with almost instant and delicious gratification after a brief cooling period in the fridge. You can pickle just about any vegetable but I decided to try cucumbers, carrots, green beans, red onions, and cauliflower. The pickled carrots were a clear winner, straddling that fine line between sweet and sour. They all go wonderfully alongside a selection of meats, cheeses, crackers and maybe some hard-boiled eggs. I also discovered that warm boiled potatoes lightly mashed with some crème fraiche, dill, and thyme, and topped with flakes of hot smoked salmon, loads of pickled red onions, and a nice dose of salt and cracked black pepper, make for a fantastic dinner on a relaxing summer evening. I have a feeling that these pickles will make a number of appearances throughout my summer, whether enjoyed on my own or with family and friends, and hopefully they make it just that much more memorable and meaningful.

Quick-Pickled Vegetables
From Alice Waters’ The Art of Simple Food
Makes enough pickling brine for about 4 jars of vegetables

Ingredients
1½ cups white wine vinegar
1¾ cups water
2½ Tbs. sugar
½ bay leaf
4 thyme sprigs
pinch of dried chili flakes
½ tsp. coriander seeds
2 whole cloves
1 garlic clove, peeled and cut in half
a big pinch of salt
fresh vegetables, cleaned, cut and prepped for pickling

To make the pickling brine, combine all of the ingredients (except the vegetables) in a pot and bring it to a boil. Add each type of vegetable to the brine separately (except the onions and cucumbers**) and cook until softer, but definitely still crisp. Use tongs to remove the vegetables and set them aside on a plate until cool. Continue cooking each type of vegetable until finished. Let the brine and vegetables cool to room temperature. Once cool, pack the vegetables into mason jars, cover with the brine, and place the lid on the jar. They will keep in the refrigerator for a week.

**Since the onions and cucumbers are so soft already, no need to pre-cook them. Just place them raw in the jars (I added some dill sprigs to the jar with the cucumbers) and add the hot pickling brine directly to the jars. Cover the jar with the lid and leave out until it cools to room temperature. Then store in the fridge with the rest. 

Honeycomb Ice Cream for my 100th Post!

I am very excited to say that this is officially my 100th post on Honeycomb. Just a month shy of when it all started 4 years ago, I can’t believe that number 100 is already here. I also can’t believe that, when averaged out, that means I’ve done one post about every 2 weeks. I thought I was way lazier than that so that’s just crazy.

It’s a bit of a strange feeling to get to this point though. I will admit that in the 4 years, there are have been many times where I simply thought about giving it all up. When I started, the food blog thing was certainly an up-and-coming fad but still not too widespread. I had these grandiose ideas that one day some fancy pants food magazine would give it a shout-out and the popularity would grow rampant. But after a long time of that not happening and food blogs becoming something that seemingly everyone and their mother had, I started to lose a bit of steam. What was the point if no one was reading it?

But every time I would get like that, something would pull me back. Maybe someone would tell me that they shared it with a friend or that they cooked one of the recipes and it turned out great. Something little but more than enough to make it all seem worth it again. The blog has changed a lot from post 1 to post 100. It started with a bit of a hippie health blog vibe, moving into angsty posts from my days spent trying to find a job, and shifting into what it is now which focuses heavily on the photography and seasonal eating with travel dining guides thrown in whenever I take a trip. I’m quite happy with where it is today and seeing how it has developed and I continue to be so glad for those moments that keep it all going!

So, to celebrate, what could be more appropriate than some honeycomb ice cream! This is probably my simplest ice cream yet but extremely satisfying. The ice cream base is straight up vanilla custard. It’s crazy sweet but unapologetically so. It gets a fantastic crunch and extra layer of flavor from handfuls of crushed-up honeycomb candy throughout. The best part is, the candy starts to melt a little in the freezer too, giving the ice cream a burnt sugar swirl. To balance out the sweetness, I highly recommend enjoying with some dark chocolate sauce and a sprinkle of some flaky sea salt (believe me, it’s fantastic) or some nice tart raspberries. And, since were celebrating here, rainbow sprinkles. Obviously.

Honeycomb Ice Cream
Makes about a quart
Recipe from Yossy Arefi via Food 52

Ingredients

For the Honeycomb
½ cup granulated sugar
¼ cup golden syrup or dark corn syrup
1½ tsp. baking soda
pinch of salt

For the Ice Cream
2 cups heavy cream
1 cup whole milk
1 cup sugar
4 egg yolks
1½ tsp. vanilla extract
pinch of salt

Begin by making the honeycomb candy. Line a baking sheet with parchment paper. In a medium saucepan, combine the sugar and syrup and stir until it becomes a paste. Place it over a medium heat. Let it cook and bubble away until the sugar is melted and the mixture is a dark maple color. Do not stir with a spatula but you can slowly tilt and swirl the pot occasionally. This should take about 5 minutes.

Once ready, whisk in the baking soda and salt. It should bubble and foam. Quickly pour the mixture onto the sheet pan. It doesn’t matter if it’s smooth, just get it all onto the sheet as fast as possible. Let cool completely before touching again. Once cool, break up into small dime-size pieces. Store at room temp in an air-tight container until ready.

To make the ice cream, combine the cream, milk, and sugar in a medium saucepan. In a separate bowl, whisk the egg yolks together. Place the saucepan over medium heat and stir until the sugar is dissolved. When the mixture starts to get small bubbles around the outside edge of the pot, remove from the heat. Slowly pour a little bit at a time into the bowl of egg yolks, while whisking. Once you’ve added about a half-cup, pour the warmed egg yolks back into the pan with the milk mixture.

Return the saucepan to the stove over medium heat. Continue cooking and stirring constantly until the mixture is thickened and coats the back of a spoon. This will take about 4-5 minutes. Remove from the heat and stir in the vanilla and salt. Pour into a container and let sit in the fridge overnight.

Then next day, churn the ice cream according to the machine’s instructions. Just before the ice cream is done churning, add in about ¾ cup to 1 cup of the honeycomb candy. Transfer the ice cream to a freezer-safe container and let freeze for at least 3 hours before eating. As mentioned above, it’s agreat with chocolate sauce, sea salt, and berries.

Israeli Couscous with Ricotta and Mint

In the past year or so I have really been making progress in visiting new states and big U.S cities, starting with Arizona, then to NYC, over to San Francisco, down to Charleston, South Carolina, and finally, this past weekend to Nashville. Granted I spent all of about 2 hours in Nashville before heading an hour south for the wedding of my beautiful friend Kelly, but had a blast celebrating in a go-big or go-home southern style. I ate too much, I drank too much, I regret nothing.

I left my camera at home for this trip, sadly passing up the chance to document some really awesome eats (lot of biscuits included!) but did manage to hit up a few lunch and coffee spots that I would highly recommend.** So, after returning home yesterday, nursing a wicked hangover and eating a salad for dinner as if cancel out a weekend full of butter-laden and whiskey-induced damage, I decided a little casual cooking and something to attempt to wean me back into a normal food routine couldn’t hurt.

This recipe for Israeli couscous with ricotta and mint is a nice way to bring some comfort and freshness to what is now straight-up summer weather. After par-cooking some Israeli couscous, the rest comes together in one skillet. Bacon and onion get to know each other in the pan before joining forces with a hefty dose of white wine, chicken broth, peas, the pasta and fresh mint. What remains is something borderline soup-ish, a brothy pasta dish that gets several dollops of ricotta and a good drizzle of olive oil at the end. Coming together quite quickly, it makes for a great after work, recovery day dish.

**For a great cup of coffee check out the super-hipster Barista Parlor and then head to The Pharmacy Burger just down the road for burgers, beers, and housemade German sausages. And, if you have a car, I highly recommend a tour at the Jack Daniel’s distillery in Lynchburg, about an hour south of the city.

Israeli Couscous with Ricotta and Mint
Serves 4
Recipe from Bon Appetit

Ingredients
1¼ cups dry Israeli Couscous
2 Tbs olive oil, plus more for serving
4 slices of bacon, chopped
1 onion, chopped
1 cup dry white wine (I used a pinot grigio)
2½ cups low-sodium chicken broth
1 cup frozen peas
2 Tbs. finely chopped fresh mint
Whole milk ricotta, for serving
Salt and pepper

Cook the Israeli couscous in a large pot of salted boiling water for 6 minutes. Reserve 1 cup of the cooking water and drain the pasta. Set aside.

In a large skillet, heat the oil over medium. Add the bacon and cook, stirring often until it starts to brown, about 5 minutes. Add the onion and continue to cook for another 5 minutes. The bacon should be crispy at this point. Add the wine, bring the mixture to a simmer and cook for another 5 minutes. Add in the broth and the pasta and return to a simmer. Cook until thickened and the pasta is al dente, about 5-8 minutes more. Give it a taste and season with salt and pepper, as desired. Add the peas and mint and cook for another 2 minutes, adding some of the reserved pasta water if it gets too thick.

Serve in a bowl with many dollops of ricotta, torn fresh mint leaves, olive oil, cracked black pepper, and a sprinkling of flaky sea salt.