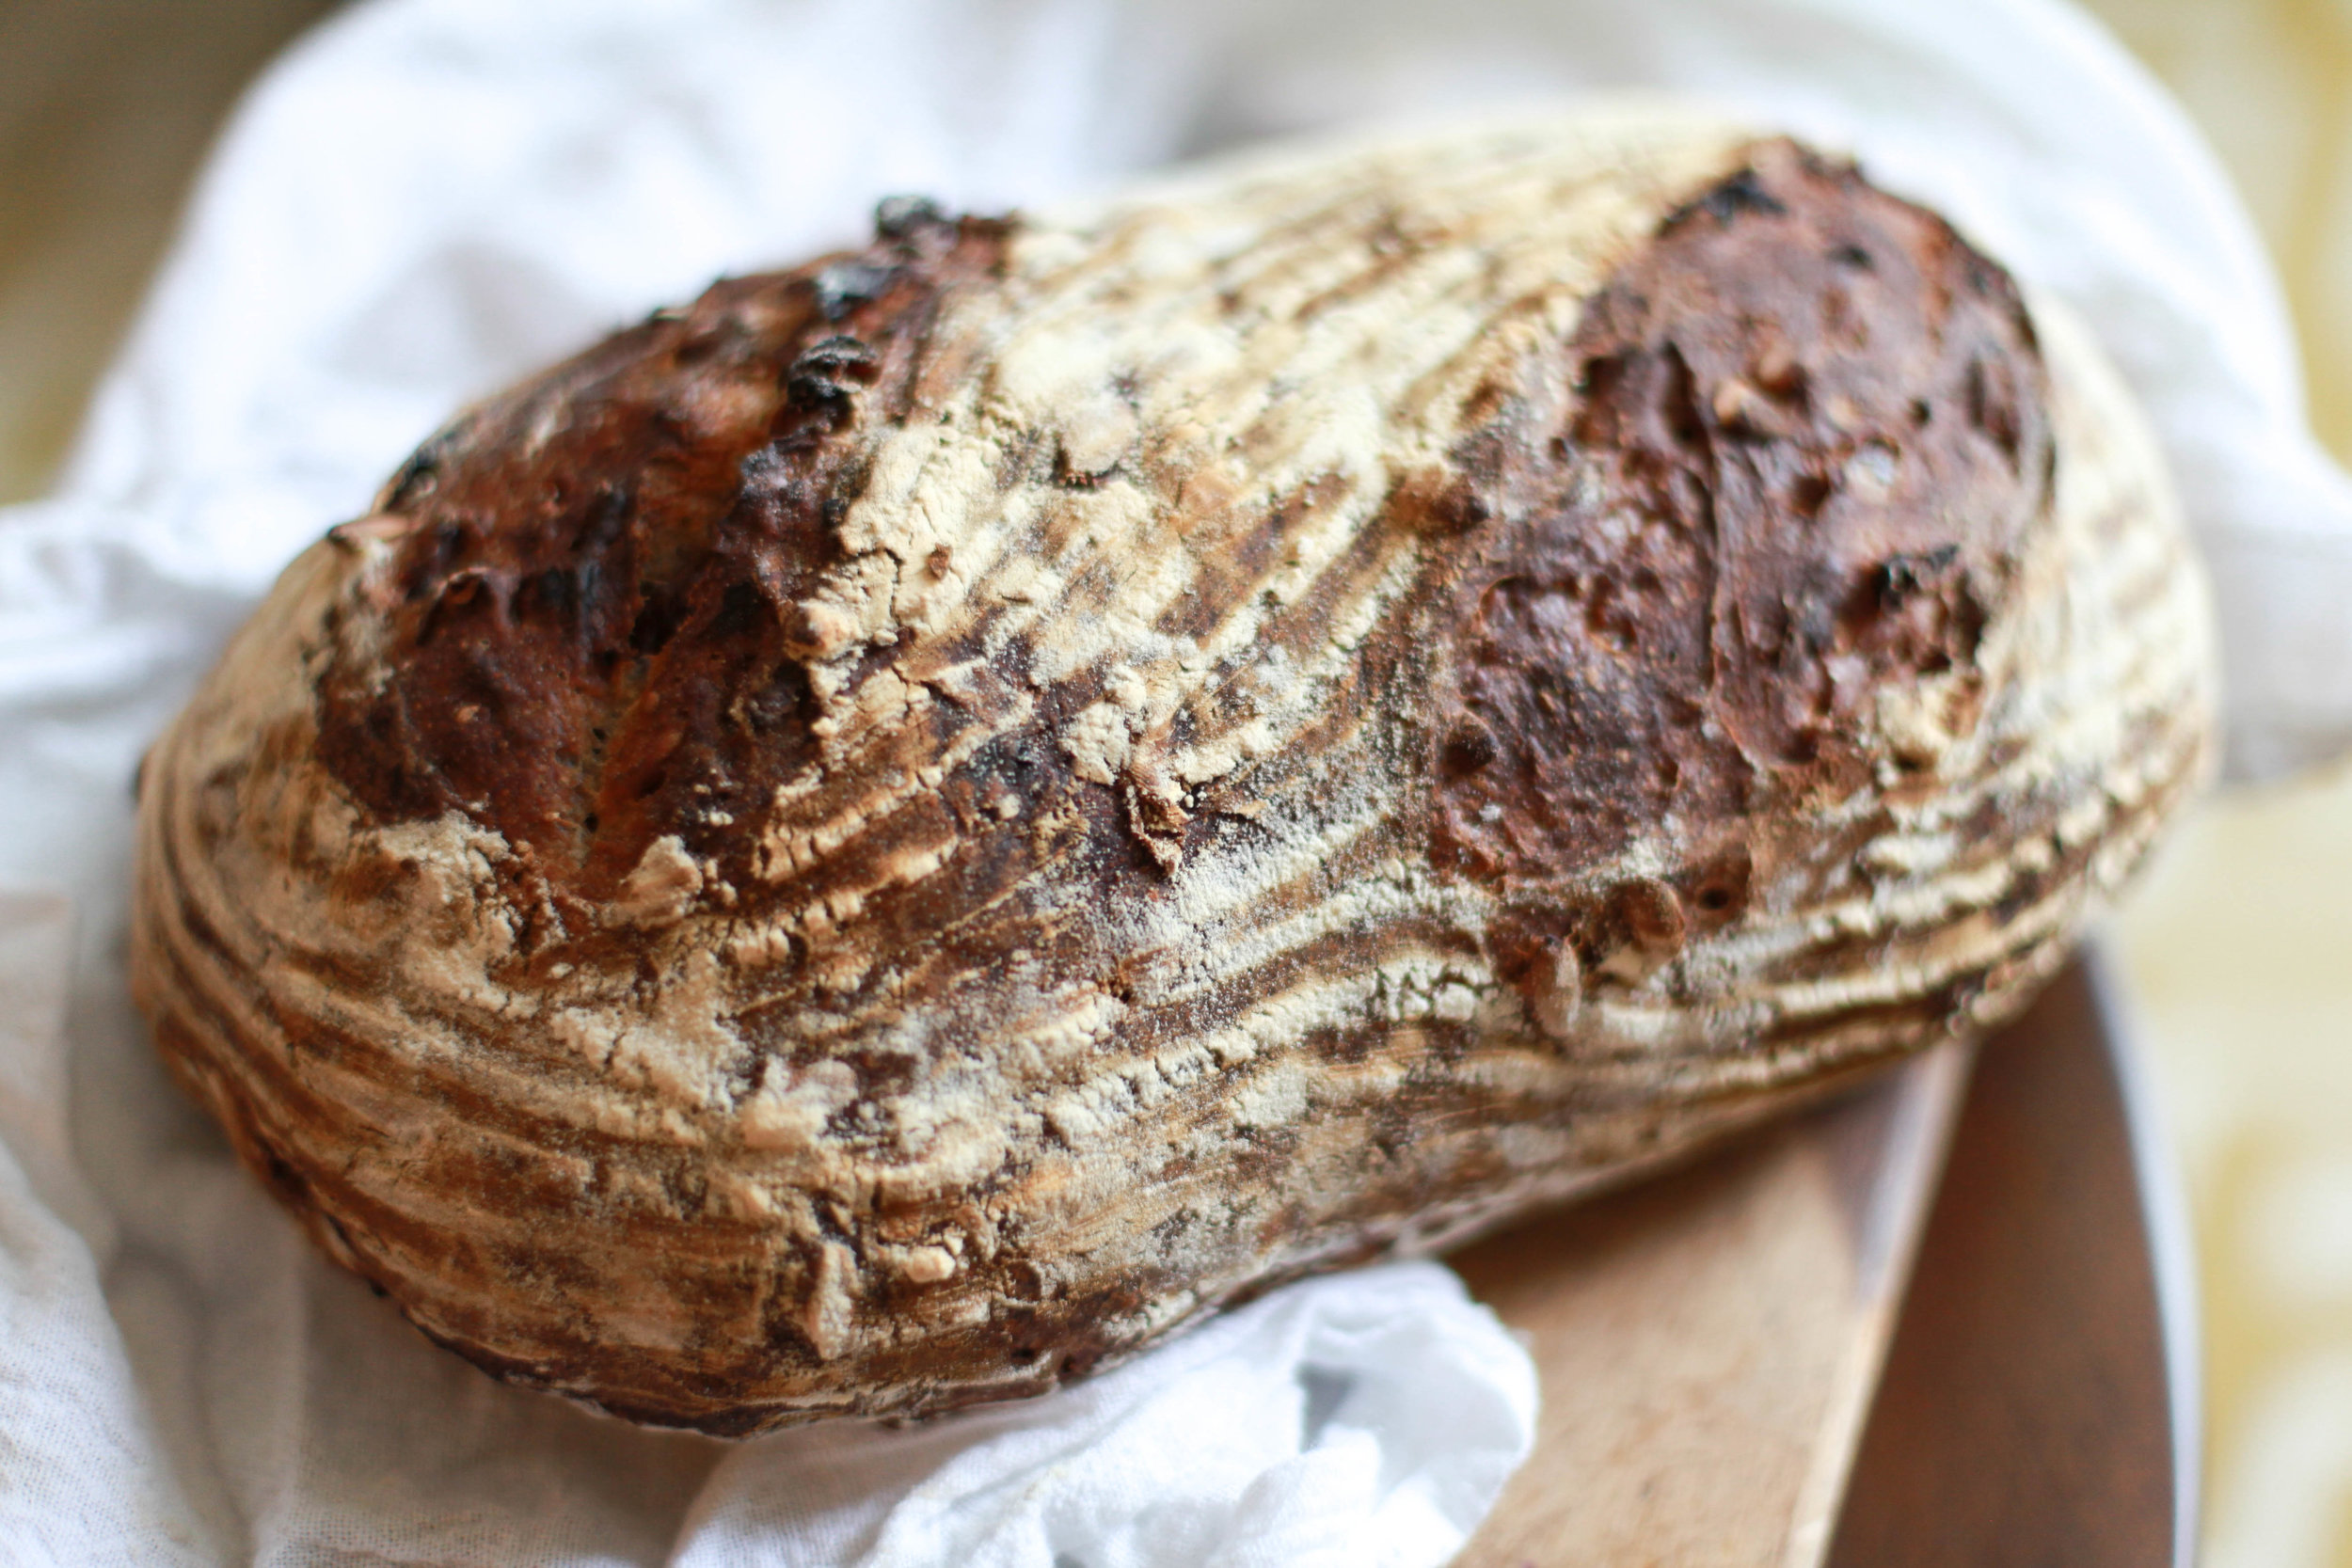
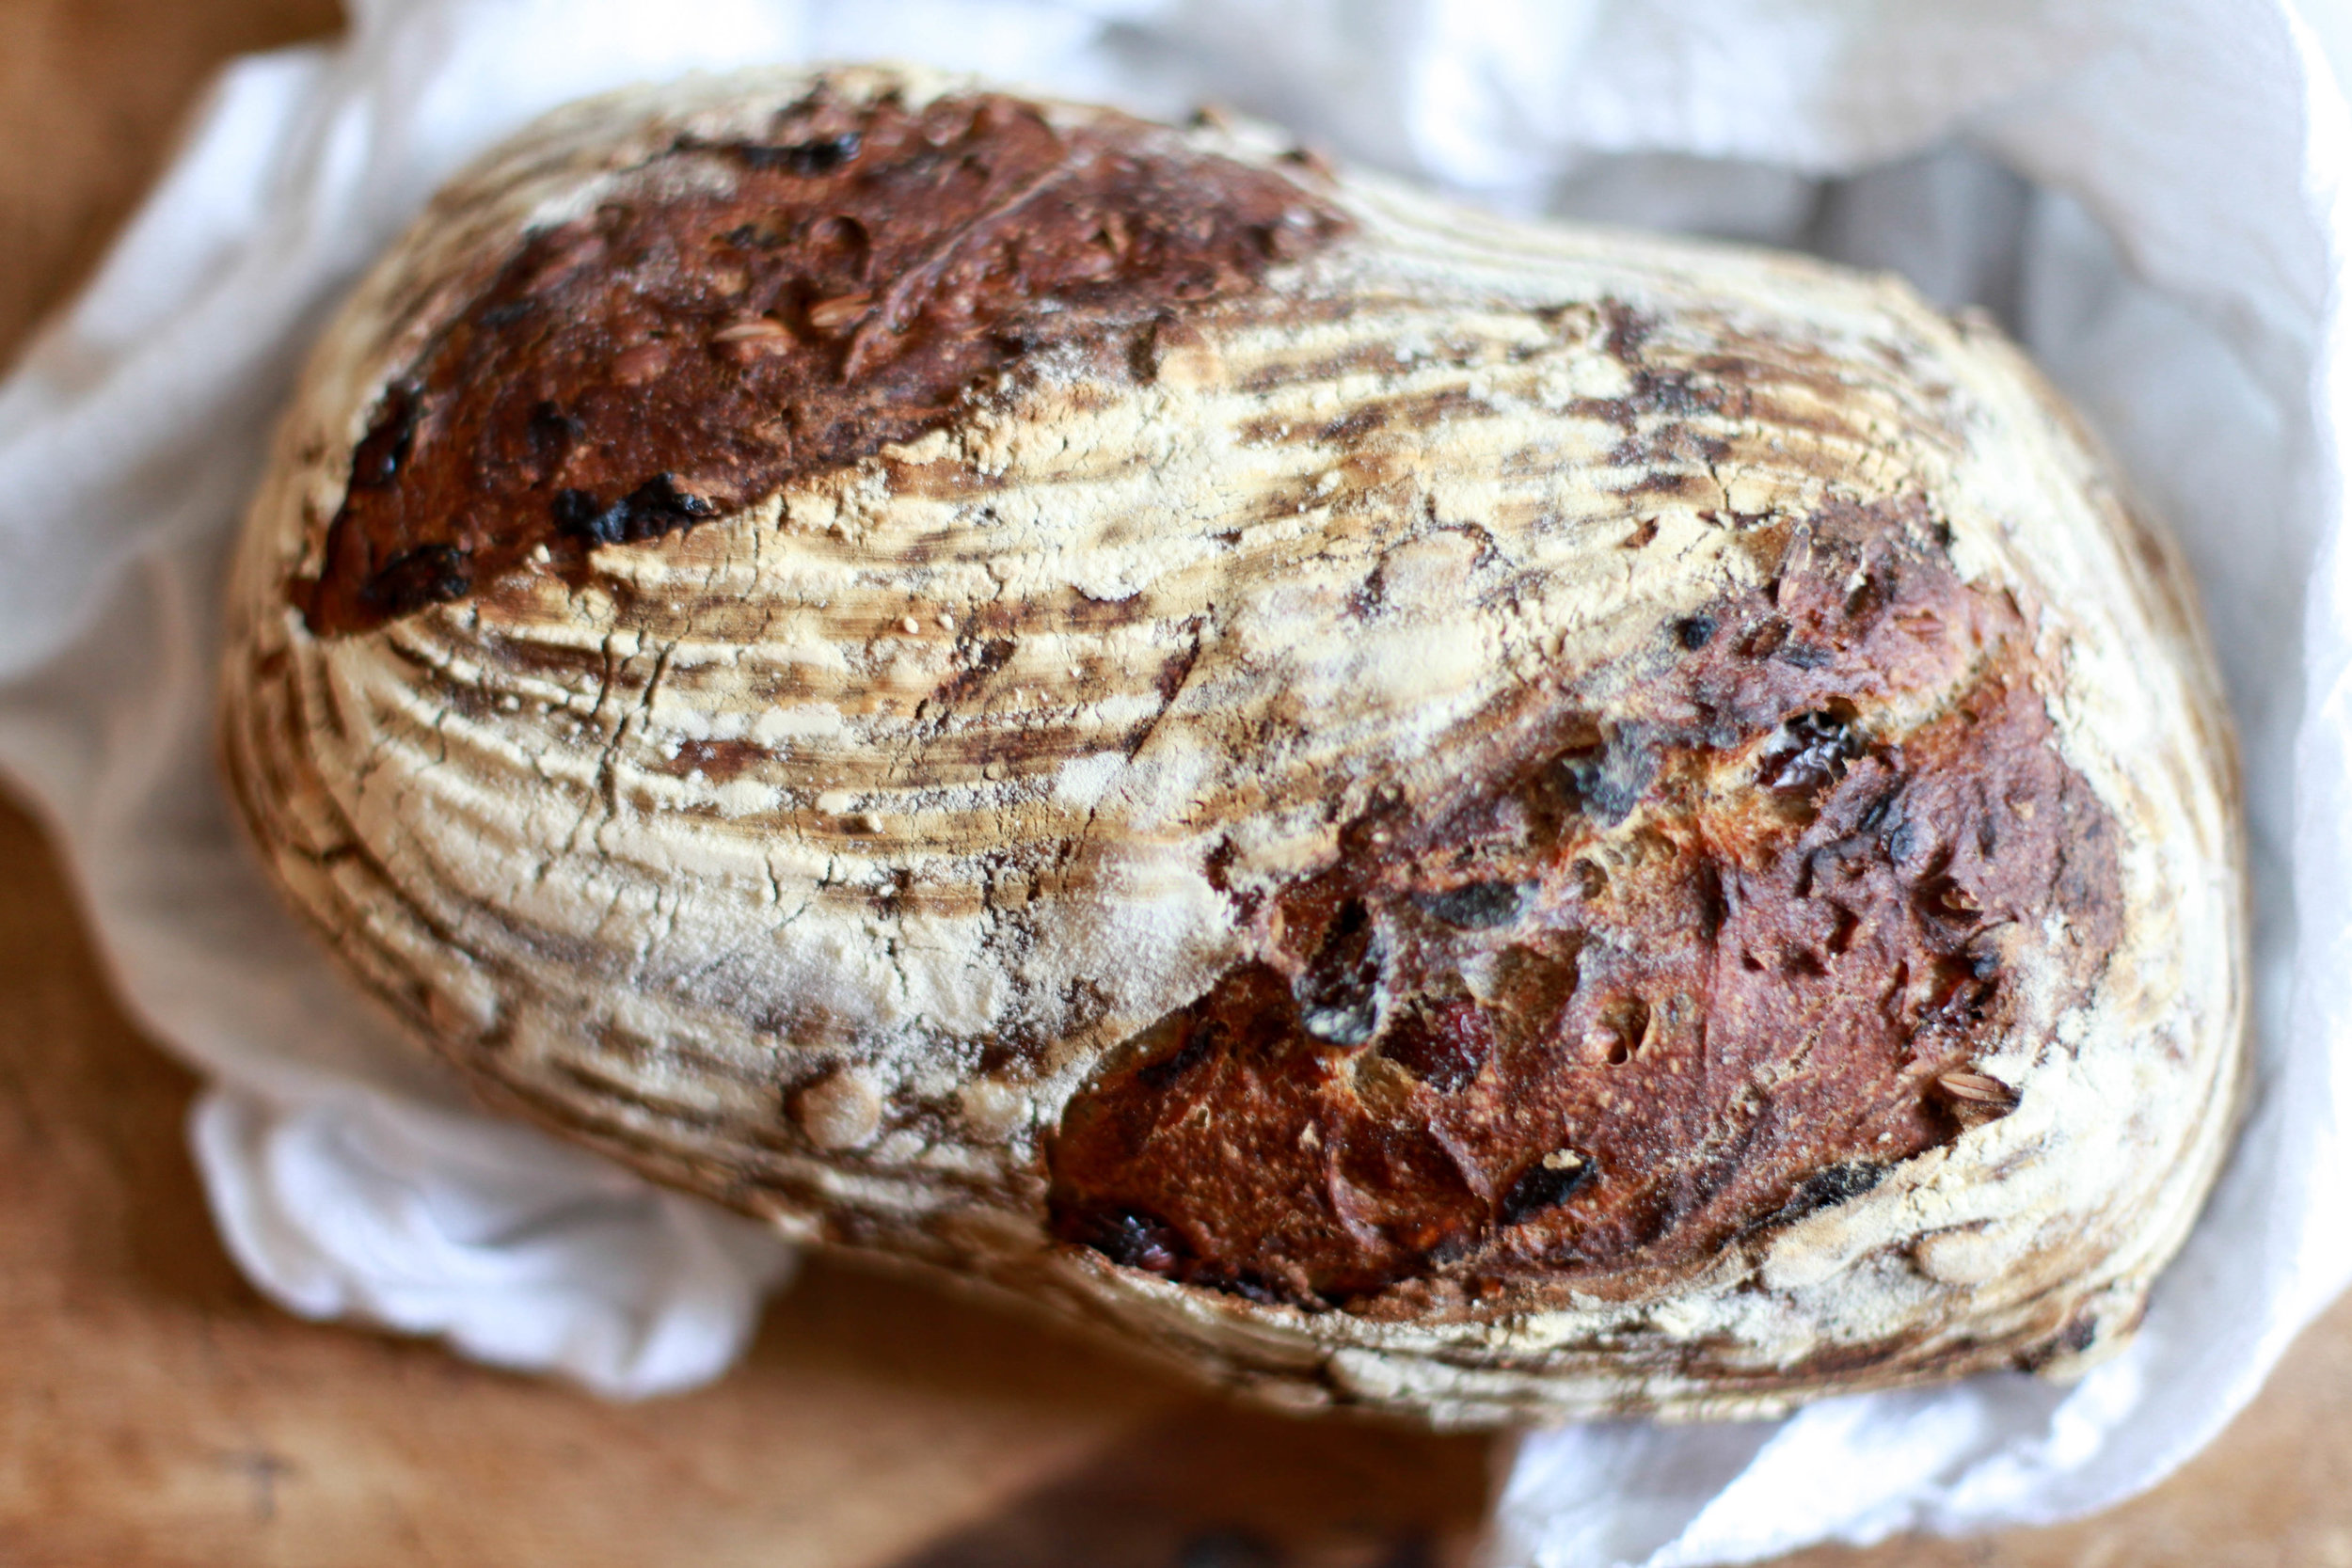
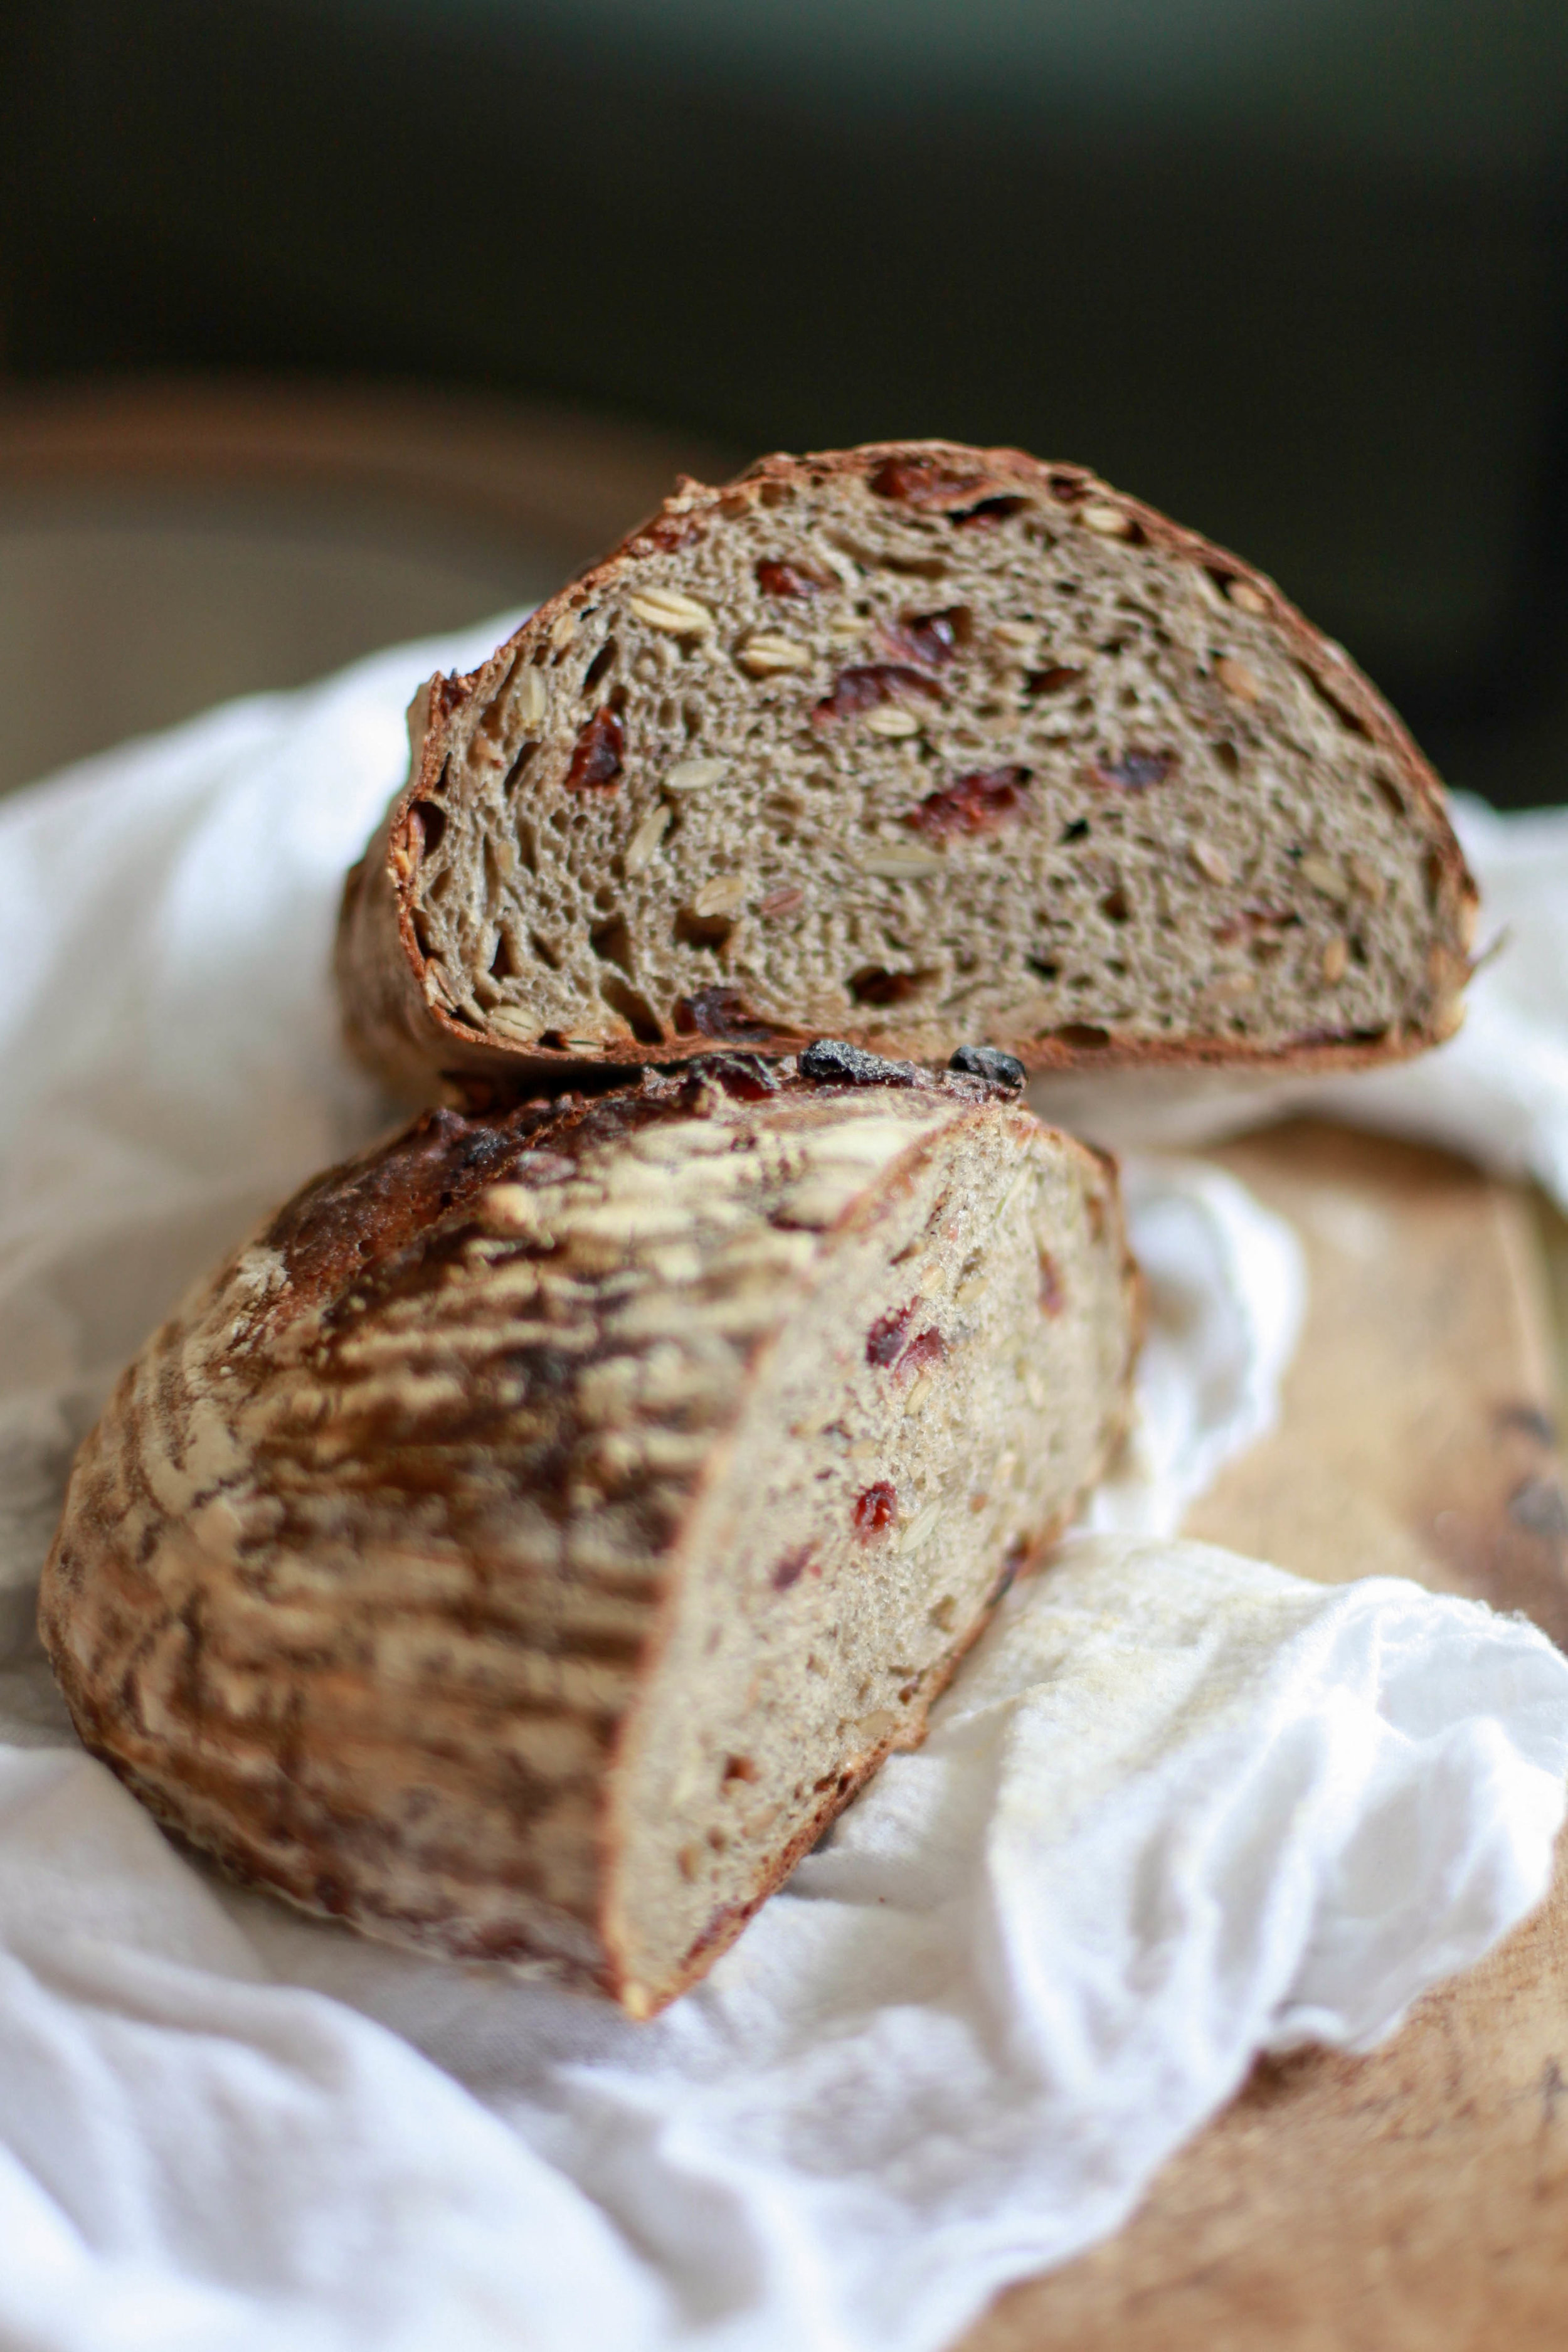
Buckwheat Sourdough with Cranberries and Pepitas

It’s interesting to look at life as a series of many miniature life cycles, to categorize different parts of it into eras or stages. We base these on bigger life events like where we are living, who we are spending out time with, etc., and it seems that as each of these comes to a close I find myself reflecting on them, wondering how it is I got there in my movement from one to the next.

At this time my “living on my own” phase is 2 weeks from its end. It’s been wonderful and gave me such sense of independence but sadly in the D.C. area it’s a luxury that came at the cost of actually going nearly broke. It’s a shitty feeling, I’ve got to say, and not exactly the way I’d like to leave a part of my life behind but you live and you learn and I guess I learned the hard way this time. On the bright side, I’ve lucked my way into what seems like will be a pretty sweet townhouse and roomie situation though, complete with giant community pool, so it could all be going much much worse. Plus, this also coincides with what I hope will be the beginning of another sort of new era for my health (read my article here for details) so I’m actually feeling pretty good about life right now.

In the meantime, we’ll talk about bread, for bread is life after all, right?As things shift towards a new cycle, I’ve also been experimenting with making my own sourdough bread, another living thing that will have its own series of mini lives, some as short as a day, throughout its eternity. As one life ends and another begins, it takes a part of its past with it, a culmination of particles from every single time before just as we bring with us our experiences and learnings with us. Maybe it is just coincidental but I like to think that this cyclical yet expansion/growth symbolism of my new hobby is my way of projecting change in my own life. Hopefully it will have the same fruitful ends as the sourdough starter. Time will tell.

I’m shameless in saying that the sourdough thing has already become an obsession and I have more loaves shoved in my freezer than I know what to do with. But I guess you have to practice a new technique to get the hang of it. Luckily, having interned in the art of bread baking with a pastry chef and having read several books on the science of bread during a time when I almost moved to Charlottesville to work the nightshift as a bread lady, it’s a skill that comes easily. That’s how after making my starter, reading Josey Baker Bread, and whipping up a few plain versions of his traditional hearth sourdough, I found myself already getting a little ambitious. Thus, buckwheat sourdough with cranberries and toasted pepitas.

Now, be patient as I go through the steps here. It’s a complicated process but at least one that requires very little active time. If you’re starting without a starter, you will need to add 2 weeks onto this as well. Sorry, but that’s just how it works. Or maybe you can ask around and find someone or a bakery that can share theirs with you! So read carefully, maybe several times through, be patient and enjoy this process and the magic that seems to make sheer flour and water come to life with wild yeast because, as they say, good things come to those who wait.

Sourdough Starter

Day 1
Mix together ¾ cup unsweetened pineapple juice and ½ cup bread flour. Cover and set aside.

Day 2
Add to this mixture ½ cup pineapple juice and ½ cup bread flour. Cover and set aside for another 24 hours.

Day 3
In a clean bowl or container with plenty of extra room, add ½ cup of the pineapple/flour mixture with ½ cup filtered water and ¾ cup whole-wheat flour. Mix well, cover, and let ferment overnight.

Days 4-14
Continue the steps of “Day 3” each day, mixing together ½ cup of the existing mixture in a new clean container with an additional ½ cup filtered water and ¾ cup whole-wheat flour. You can throw away whatever is left of the previous day’s mixture. Over time the starter will become more and move active, creating lots of bubbles and giving off a nice boozy smell. Each time you add the new ingredients to the existing, this is called “feeding your starter.” By the end of 2 weeks, you should have cultivated enough wild yeast that it is ready for using in a loaf of bread.

Note: It is best to use starter that is at least 12 hours post-feeding for baking. Also at this point, you can start storing it in the fridge while not using where it will remain dormant. Just make sure you don’t put it in the refrigerator until it has a chance to ferment, ideally 12 hours after feeding. To use again, remove from the fridge and let sit at room temperature for 12 hours then feed your starter. It should become active pretty quickly. Ideally you will do this a few days before baking and then you can go back to storing the starter in the refrigerator until ready to bake again.

Buckwheat Sourdough with Cranberries and Toasted Pepitas.

Makes 1 loaf of bread
Adapted from Josey Baker Bread

Ingredients
For the pre-ferment (essentially a small amount of dough that ferments before being added to a larger amount of dough)
1 Tbsp. sourdough starter
120 grams cool water
105 grams whole-wheat flour

For the dough
The entire pre-ferment
240 grams lukewarm water
345 grams bread flour
30 grams buckwheat flour
2 tsp salt
½ cup dried cranberries
½ toasted, unsalted pepitas

Make your pre-ferment by mixing up the ingredients in a bowl and covering. Set aside for 12 hours in a cool place.

2 hours before mixing your dough together, combine the pepitas and cranberries in a bowl and cover with hot water. This will hydrate them so they don’t steal moisture from your bread dough.

In a large bowl, combine the pre-ferment, the water, bread flour, buckwheat flour, and salt. Drain your fruit and seeds and add these in as well. Using your hands, mix together the dough for 2-3 minutes pulling up on it from the sides and pushing it down into the center, making sure you are rotating the bowl a little each time. The dough will be sticky and that’s ok.

Cover and let sit for 30 minutes. After it sits, knead the dough in the bowl again by wetting your hand and continuing this process of pulling up on the dough and pushing it back down for another minute. Cover and let rest for another 30 minutes. Knead the dough like this 2 more times, each with a 30-minute break in between.

After the 4th kneading, it’s time for the dough to proof. Cover the bowl and set aside until the dough rises by half. This will take 2-3 hours at room temperature or 12-48 in the fridge if you need to hold off for a while. After it has risen, it is time to shape the dough.

Transfer to a floured surface and using floured hands, pull the edges gently up and to the center so that the dough is rounded and there is a seam at the top holding those edges together. Flip over so that it’s seam side is down and let rest for 10 minutes. While you wait prepare your proofing basket by dusting with flour or line a bowl with a clean cotton cloth and liberally flour the cloth. Flip your dough back over, dust with a little flour, and gently stretch into a small square-ish shape. Take the top two corners and fold them 2/3 down. Take the bottom two corners and fold them 2/3 up. Give the dough a 90 degree turn and then working from top to bottom, roll up the dough into a ball and place it in your proofing basket or cloth-lined bowl seam side up. Cover and let rise at room temperature for 3 hours or in the refrigerator for 6-24, making sure you bring it back to room temp before baking.

45 minutes before baking, preheat the oven to 475 degrees with a baking stone or steel inside on the center rack. 5 minutes before baking, place an empty sheet tray on the rack right below and prepare a cup or two of cool water. Invert your loaf onto a well-floured pizza peel. Slash the top with a razor blade and slide it onto your baking stone or steel and quickly pour the water into the hot sheet tray underneath to create a nice steamy environment. Shut the oven door quickly. Bake for 25-30 minutes until it's a nice rich brown.

Once baked, transfer to a cooling rack and let cool for at least an hour before slicing and enjoying the fruits of your labor.

Sun and Moon Cookies

Right before I started Whole30 (on day 21, almost there guys!) I wanted to make something dessert-like but nearly paleo so that I could have something stashed away in the freezer for the moment it was over but wouldn’t totally ruin what I’d worked for. I knew that My New Roots would be a good source for these sorts of recipes but didn’t expect for the first recipe that I saw to be the one to get the final vote.

The reason: chocolate

The lack of chocolate in my daily life has been, without a doubt, the hardest part of Whole30. Much of the time I only ever had a piece at work and a small square when I’m watching tv at night but without those little pleasures during my day, I may just go insane soon. I’m sure the past 5 days of strict post-surgery bed rest hasn’t helped the feeling. My dad said I look like Grandpa Joe. It was kinda funny. But hey, if chocolate got him out of bed and good as new, maybe it’ll do the same for me. I guess I’ll find out in 9 days when I get to eat the rest of these cookies. Ah, yes, the cookies.

These are the most deceiving cookies I’ve ever encountered. Despite their texture, which seems to cross the lines of cookie and brownie, despite their pleasant crunchy coating to offset the fudgy center, and despite their deep chocolaty flavor, both earthy and sweet, they are as close to healthy as a cookie could possibly get. But with zero compromises. None!

The main bulk of the cookie comes from a combo of naturally sweet sunflower seed butter and rich dark cocoa powder, hence the name Sun and Moon Cookies. A few eggs hold them all together and they get an extra boost of flavor from some vanilla, salt, maple syrup, and big chunks of dark chocolate (the only ingredient making them non-paleo since it has a smidge of sugar in it). Once this sticky dough comes together, pieces are rolled in a mixture of sunflower seeds and shredded coconut and are baked. The resulting cookie has a really crackly look to it, breaking up the nubbly seed coating with rivets of deep brown. And maybe there’s even some melted chocolate oozing out of the top. Even when Whole30 is gone from my life and I’m back to “normal food” I have no intention removing these from the repertoire, they are seriously that good.

So 9 more days. A long time, it seems, to wait until I get to devour my remaining cookies but I’m hoping it’s all been worth it in the end. But for now I remain as Grandpa Joe-esque as you can get, holding onto that day when chocolate and freedom somehow become the very same. Soon enough.


Sun and Moon Cookies
Makes 18-20 cookies
Adapted very slightly from My New Roots

Ingredients
1 cup smooth unsalted sunflower butter
2 eggs
2 tsp. vanilla extract
¼ tsp. sea salt
1 tsp. baking soda
½ cup pure maple syrup
½ cup sifted cocoa powder
6 oz chopped dark chocolate
¾ cup raw unsweetened shredded coconut
1 cup sunflower seeds

Preheat the oven to 325 degrees and line a large baking sheet with parchment paper. In a bowl, whisk together the sunflower seed butter and the eggs. Add in the vanilla extract. Keep mixing until smooth; you may need to switch over to a wooden spoon at some point.

Stir in salt, baking soda, and syrup and then add in the sifted cocoa powder and chopped chocolate, mixing until smooth.

Combine the sunflower seeds and the coconut in a separate bowl. Use your hands to shape tablespoon-sized balls out of the dough and roll them in the sunflower seed and coconut mixture. You may need to keep your hands damp to keep the dough from sticking. Place the cookies on your prepared baking sheet and bake for 11-13 minutes until cracked and set. Transfer cookies to a cooling rack and let cool slightly before eating. These keep well in the freezer for several months or at room temperature for up to a week.

Seared Skirt Steak with Pickled Jalapeño Relish

2 months ago, I set out with one of my best friends on yet another road trip of ours to visit friends in Pittsburgh for the first time. I didn’t know what to expect of the city. To be honest I’d never really given it much thought. Our plans were loose; we had tickets to a beer fest that night and hoped to get in some sightseeing the next day but nothing else. What I didn’t anticipate was having probably the best weekend so far this year, one packed with booze, awesome eats, and some really fantastic people.

One thing to note, when my friends and I get together, there’s nothing that we hold back on as far as topics of conversation. So when Saturday came around and we all had overcome our hangovers with round 2 of beer-drinking, things got a little weird. I guess it all started when my friend and I ordered a bowl of meat at a brewery and couldn’t get over the sheer novelty and genius of it. “Why is this not a thing?!” we wondered. In the age of fast-casual, shouldn’t we capitalize on this and introduce a meat-only option where all you can possibly order is a bowl of meat and maybe, just maybe, a flight of dipping sauce options? Possible names included “Meat Sweats!”, “Meat ‘n’ Greet”, “The Meating House”, then some more inappropriate ones… you get the picture. Maybe a bowl of complimentary tums to grab on the way out? I’m almost embarrassed to admit how long this conversation carried on. Almost.

Anyway, after pre-gaming dinner with our sour beers and meat bowls, we headed out to dinner at a place called Gaucho. They specialize in Argentinian style meat so it was very appropriate. I was warned there would be a wait, and wait we did…for an hour and half…in the snow. Mind you it was 75 degrees the day before and I did not pack for the impending temperature drop. Luckily we passed the time delving into the specifics of our meat concept some more and trying to figure out what we wanted from their extensive menu. Though despite the many options, we all ended up getting the same thing. Steaks all around! But not just any steak. It’s marinated and grilled with unlimited chimichurri for dipping, a big simple salad, and slabs of charred, garlicky rustic bread for mopping up the juices, all arranged on a wooden board. I also ordered a side of more bread, duh, and mashed sweet potatoes and once we all had our food after nearly 2 hours of waiting, all was quiet. Important meat-related activities were taking place.

I haven’t forgotten about that meal since, which is why it occurred to me that it probably would be a good idea to recreate it to some degree. I also figured it would be a nice way to kick off my month of Whole30* (without the bread of course) and ended up with the best result I could have imagined. I started with Julia Turshen’s recipe for grilled skirt steak with pickled jalapeno relish, utilizing the bangin’ farmers market skirt steak I’d gotten earlier that day and subbing parsley for the cilantro for that chimichurri vibe and because, well, I hate cilantro. But that’s a story for another day. The mashed sweet potatoes were a “wing it” sort of deal: roast the potatoes until super-tender and mash them with some coconut oil, smoked paprika, cumin, and s&p and top with roasted pumpkin seeds. Unsurprisingly, with my local, never frozen meat and the genius of Julia’s recipe, this effortless, few-ingredient recipe really delivered and packed a serious punch of flavor. Cutting the meat across the grain makes it crazy tender and cooking it in a hot cast iron pan gives it that nice smoky crust on the outside. Paired with the tangy and spicy relish and the creamy sweet potatoes, I could’ve sworn I was back at Gaucho with my friends. But at least now I have a solid meat and sauce combo for our restaurant to bring to the table.

*I knowwww I’ve given my disapproval for fad diets before. And I still cringe at myself for doing this. But with an upcoming surgery at the end of the month, I figured it wouldn’t hurt to get my body in a good state for healing. I’m ok, just taking care of a personal health issue I’ve been trying to beat for a while but without much luck. All is well though, one day I think I can talk about it here, but today is not that day. Anywayyy, eat this steak!


Seared Skirt Steak with Pickled Jalapeño Relish
Served 3-4
Adapted from Julia Turshen’s Small Victories

Ingredients
½ cup chopped pickled jalapeños
¾ cup finely chopped parsley
1 garlic clove, minced
grated zest and juice of 1 large or 2 small limes
½ cup plus 2 Tbs. extra-virgin olive oil
salt and pepper, to taste
2 lb. skirt steak, patted dry with paper towels

In a bowl, combine the jalapeños, parsley, garlic, lime zest and juice, and ½ cup of the olive oil and use a fork to whisk together. Season to taste with the salt and pepper.

Heat a cast-iron skillet over medium high. Rub the steak with the remaining 2 Tbs. of olive oil and season with salt and pepper. Place the steak in the skillet until it starts to form a crust (about 2 minutes) and flip to the other side. Repeat this on the second side. Then, continue flipping the steak every 30 seconds or so until it reaches your desired doneness. It took about 6-8 total minutes for my medium-rare steak. (Here’s a good way to test your steak-doneness).

Remove from the skillet and let rest on the cutting board for 5 minutes. Slice across the grain and serve with your jalapeño relish, mashed sweet potatoes, and a side salad.


Curried Peanut Soup

I’ve wanted to tell you about this soup for a long time, over five years actually. I remember making it for the first time in the 2-bedroom townhouse where I lived (I now pay 3 times as much for an apartment that is half the space, ugh) and attempted to photograph it. Even then I was far too unhappy with the picture to post it, and mind you this is when I was still using my on-camera flash on a regular basis. But perhaps the root of the problem was the sheer fact that the soup itself is downright ugly, a problem that props, lighting, or camera quality can’t fix.

It’s a shame really. The soup is so vibrant and unusual once you taste it, a combination of coconut, curry, and peanut with a slow-burning heat and some pops of acidic lime alongside a slew of hearty vegetables. But it’s hard to get that point across when the final product is so… brown. And not the good brown like steak brown. This is a light sickly orange-green brown, one that it reminiscent of many unpleasantries that I’ll leave to your own imagination. And unfortunately it just so happens to taste really delicious with couscous (beige) and toasted coconut (brown). Sigh. But after making this soup so many times these past 6 years, I couldn’t hold back any longer. So here it is, in it’s many shades of brown, one of my favorite dishes of all time, curried peanut soup.

I’ve made this a variety of ways, trying different vegetables and proteins, but this is how I like it best. You get a good mix of textures and flavors to help break through the richness of the coconut and peanut with the chunks of fire-roasted tomatoes and the earthy sweet potatoes and spinach. But, feel free to add green beans and/or frozen corn in addition to or instead of some of the other vegetables to change it up. If you’re craving something lighter, you can use a fish like cod or some peeled shrimp instead of the chicken if added raw to the simmering soup at the end until cooked through. Or, leave out the protein altogether for a filling vegetarian main. The couscous, toasted coconut, and lime squeeze are pretty clutch though and I wouldn’t skip out on those add-ons. No matter how you make it though, you’re going to end up with a crazy satisfying soup, albeit an ugly soup, but a good one for sure.


Curried Peanut Soup
Serves 8
Adapted slightly from The Traveler’s Lunchbox

Ingredients
4 Tbs. olive oil
1.5 lbs chicken thighs, cut into small chunks
1 onion, diced
1 clove garlic, minced
1-2 fresh jalapenos, seeded and finely diced
3 carrots, peeled and sliced into thick coins
1 medium sweet potato, peeled and diced into chunks
2 Tbs. curry powder
a pinch of cayenne
5 cups chicken stock
1-28oz can fire-roasted tomatoes
2/3 cup smooth peanut butter
1 cup full-fat coconut milk
8oz fresh baby spinach
1 handful chopped parsley

to serve
1 cup couscous, cooked according to package instructions
toasted coconut chips
lime wedges

In a large heave-bottomed pot, heat 2 Tbs. of the oil over medium. Season the chicken with salt and pepper and add to the pot. Cook, stirring occasionally, until browned and cooked through. Transfer to a plate and set aside.

In the same, pot, add the rest of the oil and then the onion, garlic, and jalapeno. Cook until the onions are softened and starting to brown, about 8-10 minutes. Add in the carrots, sweet potato, curry powder, and cayenne and cook, stirring, for about a minute more. Add the stock and the tomatoes with their juices. Scrape off any bits stuck to the bottom of the pot and bring to a boil. Once boiling, reduce to a simmer, add the chicken back in, and cook over low for about 20 minutes until the carrot and sweet potato pieces are cooked through.

Add the peanut butter, coconut milk, and spinach to the soup and stir. At this time you can also make your couscous. Let the soup simmer until the spinach is wilted and thickened slightly, another 10 minutes.

Season to taste with salt and pepper. Serve the soup alongside the couscous and top with toasted coconut and a squeeze of lime.

This is NOT a Valentine’s Day Cake

Ok, yes, well maybe it looks like that. But trust me, it’s not.

This is Julia Turshen’s ultra luxurious and wicked simple coffee-scented chocolate cake. It’s filled with cherry preserves, drenched in a sour cream chocolate frosting, and topped with chocolate amaretti cookies, gold sprinkles, and freeze-dried strawberries. And it just so happens to be shaped like a heart, deal with it.

So why is this chocolate heart cake not a Valentine’s Day cake? Because Valentine’s Day puts people on edge and I don’t want that energy associated with this cake. Single people feel left out for the entire day, couples worry about making sure they are “doing enough,” and if you’re not fretting over it, you’re enraged by made-up-holiday consumerism. It’s ridiculous and nobody wins, especially when you’re me at age 13 and just bought a pair of heinous red suede Nike sneakers with hearts on them because you’re stupidly obsessed with this holiday for some reason. So that is why this is not a Valentine’s Day cake.

However, being in the shape of a heart, and being such a sweet and tasty and happy cake, maybe when we eat it we can remind ourselves of the importance of love and compassion. And not just for this one day, but for every day and everyone. A life of love, towards others, towards the planet, towards our own self, is always something to be happy about. And a definite cause for cake, especially this magical little cake. So tell people you love them, do something that makes a difference, and don’t be afraid to even treat yo self, because why not. Happy…er…um… Day. Yes, Happy Day… or whatever. Just make this cake.

Not a Valentine’s Day Cake / Quasi Black Forest Cake
Slightly adapted from Julia Turshen’s Small Victories

For the Cake
1¼ cups all-purpose flour
1 cup sugar
¾ cup Dutch-processed cocoa powder
1 tsp. baking soda
1 tsp. baking powder
½ tsp. kosher salt
1 stick unsalted butter, melted and cooled
2 eggs, lightly whisked
1 cup strong coffee, at room temperature
1 cup buttermilk
1 tsp vanilla extract

For the Frosting
¾ cup semisweet chocolate chips
¾ cup room temperature sour cream
1 Tbsp maple syrup
1 tsp. vanilla extract

To assemble and decorate
½ cup cherry preserves
crushed amaretti cookies
freeze dried strawberries (optional)
gold sprinkles (optional)

Preheat the oven to 350 degrees. Butter two 8-inch cake pans (or one heart pan) and line the bottom with parchment paper. In a large mixing bowl, whisk together the flour, sugar, cocoa powder, baking soda, baking powder, and salt. Add in the melted butter, eggs, coffee, buttermilk, and vanilla. Whisk until combined.

Divide the batter between the two pans or one pan if that’s all you have. Bake for 30 minutes (40-45 if you’re just using the one pan) until a toothpick inserted in the center comes out clean. Place on a cooling rack and once completely cool, remove from the pan and peel off the parchment paper. If you baked in just one pan, horizontally cut the cake in half after it cools.

While the cakes are baking, make the frosting. Set up a double boiler by placing a mixing bowl over a simmering pot of water without letting the bowl touch the water. Add the chocolate chips to the bowl and stir until completely melted. Remove the bowl from the pot and stir in the sour cream, maple syrup, and vanilla. Refrigerate for at least an hour.

To assemble the cake, spread the cherry preserves over half and place the other half on top. Use a small offset spatula to spread 1/3 of the frosting over the top and sides of the cake. Refrigerate for 15 minutes until the frosting sets a bit. This keeps the final layer of frosting from picking up cake crumbs. Spread the rest of the frosting over the cake and refrigerate at least another hour. Serve with the garnishes sprinkled overtop.